Designing visually appealing content has never been easier, thanks to Canva’s intuitive platform. Whether you're a seasoned graphic designer or a beginner looking to create professional-looking designs, understanding how to group stuff on Canva is a game-changer. This powerful feature allows users to combine multiple elements into a single group, making it simpler to move, resize, or edit them collectively. By mastering this skill, you can streamline your workflow, enhance creativity, and produce polished designs effortlessly. In this comprehensive guide, we’ll explore everything you need to know about grouping in Canva, from basic techniques to advanced tips, ensuring you’re equipped to take your designs to the next level.
Canva has revolutionized the world of digital design by offering a user-friendly interface that caters to all skill levels. One of its standout features is the ability to group elements, which significantly boosts efficiency and creativity. Grouping allows you to organize your design elements into cohesive units, making it easier to manage complex layouts. This feature is particularly useful when working on projects that require frequent adjustments or when collaborating with others. By grouping elements, you can maintain consistency across your designs while saving time and effort. In the following sections, we’ll delve deeper into the nuances of grouping in Canva, providing step-by-step instructions and expert tips to help you become a pro.
As you embark on your Canva journey, mastering how to group stuff on Canva will undoubtedly become one of your most valuable skills. This guide will not only teach you the technical aspects of grouping but also offer practical advice on how to use this feature effectively in various design scenarios. From creating stunning social media graphics to designing professional presentations, grouping can enhance your workflow and elevate your designs. So, whether you're a business owner, marketer, or creative enthusiast, this article will provide you with the knowledge and tools you need to harness the full potential of Canva’s grouping feature.
Read also:Unlock The Secrets Of Catildesup3mo Conquistar Una Mujer A Comprehensive Guide
What Is Grouping in Canva and Why Is It Important?
Grouping in Canva refers to the process of combining multiple design elements into a single entity, which can then be moved, resized, or edited as a whole. This feature is incredibly important because it simplifies complex designs, making them easier to manage and modify. For instance, if you’re designing a logo or a poster with multiple layers, grouping allows you to treat these layers as a single unit, reducing the risk of accidental changes. Additionally, grouping helps maintain consistency across your designs, ensuring that all elements remain aligned and proportionate. By grouping elements, you can also create reusable templates, saving time and effort in future projects.
In practical terms, grouping is essential for streamlining your workflow, especially when working on intricate designs. For example, if you’re designing a flyer with text, images, and shapes, grouping these elements together allows you to move them as a single unit without disrupting their alignment. This feature is particularly useful when collaborating with others, as it ensures that all team members can work on the same elements without confusion. Furthermore, grouping enhances creativity by enabling you to experiment with different layouts and compositions without losing the integrity of your design. In essence, grouping is a fundamental tool in Canva that empowers users to create professional, polished designs with ease.
To illustrate the importance of grouping, consider a scenario where you’re designing a business card with multiple text boxes, icons, and background shapes. Without grouping, moving one element might disrupt the alignment of others, leading to a messy design. However, by grouping these elements, you can ensure that they remain perfectly aligned, regardless of how you adjust their position or size. This level of control and precision is what makes grouping such a vital feature in Canva, and mastering it can significantly enhance your design capabilities.
How Does Grouping Work in Canva?
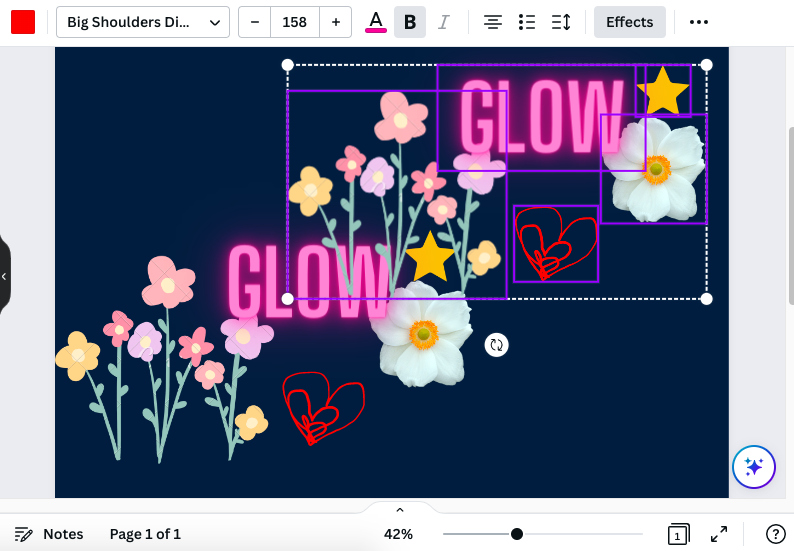
Understanding how grouping works in Canva is essential for leveraging this feature effectively. To group elements, simply select the items you wish to combine by holding the Shift key (or Command on a Mac) and clicking on each element. Once all desired elements are selected, right-click and choose "Group" from the dropdown menu. Alternatively, you can use the keyboard shortcut Ctrl + G (Cmd + G on a Mac) to group the selected items. Once grouped, the elements will be treated as a single unit, allowing you to move, resize, or rotate them collectively.
It’s important to note that grouped elements can still be edited individually. To do so, simply double-click on the group to enter "edit mode," where you can modify each element separately. Once you’re done making changes, double-click outside the group to exit edit mode and return to the main design canvas. This flexibility ensures that grouping doesn’t limit your ability to refine individual elements while maintaining the overall structure of your design. Additionally, Canva allows you to nest groups within groups, providing even greater control over complex designs. By mastering these basic grouping techniques, you can unlock the full potential of Canva’s design capabilities.
What Are the Benefits of Grouping in Canva?
The benefits of grouping in Canva extend beyond mere convenience, offering a range of advantages that enhance both efficiency and creativity. One of the primary benefits is improved organization, as grouping allows you to keep your design elements neatly arranged and easily accessible. This is particularly useful when working on large or complex projects, where multiple layers and elements can quickly become overwhelming. By grouping related elements, you can maintain a clear and clutter-free workspace, making it easier to navigate and manage your designs.
Read also:Why A Ski Town Chicken Joint Could Be The Perfect Pit Stop For Adventure Seekers
Another significant benefit of grouping is enhanced collaboration. When working with others, grouping ensures that all team members can work on the same elements without accidentally modifying unrelated parts of the design. This reduces the risk of errors and streamlines the review and feedback process. Additionally, grouping promotes consistency across your designs by keeping all related elements aligned and proportionate. This is crucial for maintaining a professional and polished appearance, especially when creating branded materials or marketing collateral. Lastly, grouping enables you to create reusable templates, saving time and effort in future projects while ensuring a cohesive design style.
Why Should You Use Grouping for Complex Designs?
When it comes to complex designs, grouping is an indispensable tool that simplifies the design process and improves overall efficiency. Complex designs often involve multiple layers, elements, and interactions, making it challenging to manage and modify them without disrupting the overall composition. By grouping related elements, you can treat them as a single unit, reducing the complexity of your design and making it easier to work with. For example, if you’re designing a website mockup with multiple sections, grouping each section allows you to move, resize, or edit them independently without affecting the rest of the design.
Grouping is also beneficial for maintaining consistency across complex designs. When working on intricate layouts, it’s easy to lose track of alignment and proportions, leading to a disjointed appearance. By grouping elements, you can ensure that all related items remain aligned and proportionate, regardless of how you adjust their position or size. This level of control is crucial for producing professional-quality designs that meet the highest standards. Furthermore, grouping enables you to experiment with different layouts and compositions without compromising the integrity of your design. Whether you’re creating a detailed infographic or a multi-page presentation, grouping can help you achieve your desired results with ease and precision.
How to Group Stuff on Canva: Step-by-Step Guide
Now that you understand the importance and benefits of grouping in Canva, let’s dive into a step-by-step guide on how to group stuff on Canva. First, open your Canva project and navigate to the design canvas where you want to apply grouping. Begin by selecting the elements you wish to group. To do this, hold the Shift key (or Command on a Mac) and click on each element you want to include in the group. Once all desired elements are selected, right-click and choose "Group" from the dropdown menu. Alternatively, you can use the keyboard shortcut Ctrl + G (Cmd + G on a Mac) to group the selected items.
Once your elements are grouped, you can move, resize, or rotate them as a single unit. To edit individual elements within the group, simply double-click on the group to enter "edit mode." From here, you can modify each element separately, adjusting their properties as needed. Once you’re done making changes, double-click outside the group to exit edit mode and return to the main design canvas. It’s also worth noting that Canva allows you to nest groups within groups, providing even greater control over complex designs. By following these simple steps, you can effectively group elements in Canva and take your designs to the next level.
Can You Ungroup Elements in Canva?
Yes, you can easily ungroup elements in Canva if you need to modify them individually or reorganize your design. To ungroup elements, select the group you wish to break apart and right-click, then choose "Ungroup" from the dropdown menu. Alternatively, you can use the keyboard shortcut Ctrl + Shift + G (Cmd + Shift + G on a Mac) to ungroup the selected items. Once ungrouped, the elements will return to their original state, allowing you to edit them independently. This flexibility ensures that grouping doesn’t limit your ability to refine individual elements while maintaining the overall structure of your design.
It’s important to note that ungrouping doesn’t delete or remove any elements from your design; it simply separates them into individual components. This allows you to rearrange or reorganize your design as needed without losing any of your work. Additionally, Canva allows you to re-group elements after ungrouping them, providing a seamless workflow for managing complex designs. By mastering the ability to group and ungroup elements, you can maintain full control over your designs and produce professional-quality results with ease.
What Are Some Common Mistakes to Avoid When Grouping in Canva?
While grouping is a powerful feature in Canva, there are some common mistakes that users often make when utilizing this tool. One of the most frequent errors is overusing grouping, which can lead to a cluttered and confusing design. It’s important to group only related elements that need to be treated as a single unit, avoiding unnecessary grouping that might hinder your workflow. Another common mistake is failing to properly align elements before grouping them, resulting in misaligned or disproportionate designs. To avoid this, always ensure that all elements are aligned and proportionate before grouping them together.
Another mistake to watch out for is neglecting to ungroup elements when necessary. While grouping simplifies the design process, it’s essential to ungroup elements when you need to modify them individually or reorganize your design. Failing to do so can limit your ability to refine specific elements and may lead to unintended changes. Lastly, some users forget to save their work after grouping elements, which can result in lost progress if the program crashes or experiences technical issues. By avoiding these common mistakes and following best practices, you can maximize the benefits of grouping in Canva and produce high-quality designs with ease.
Advanced Techniques for Grouping in Canva
Once you’ve mastered the basics of grouping in Canva, you can explore advanced techniques to further enhance your design capabilities. One such technique is using nested groups, which involves grouping multiple groups together to create complex hierarchies. This is particularly useful when working on large or intricate designs, as it allows you to organize your elements into logical layers, making it easier to manage and modify them. For example, if you’re designing a multi-page presentation, you can create separate groups for each slide and then nest them within a larger group for the entire presentation.
Another advanced technique is utilizing locking and unlocking features in conjunction with grouping. By locking grouped elements, you can prevent accidental modifications while still allowing individual elements within the group to be edited. This is especially helpful when collaborating with others or when working on designs that require frequent adjustments. Additionally, Canva offers a range of formatting options that can be applied to grouped elements, such as shadows, borders, and transparency. By experimenting with these options, you can create visually striking designs that stand out from the crowd. These advanced techniques, when combined with the basics of grouping, can take your Canva skills to the next level.
How Can You Optimize Your Workflow with Grouping?
Optimizing your workflow with grouping in Canva involves implementing a strategic approach to organizing and managing your design elements. Start by identifying related elements that need to be treated as a single unit and group them accordingly. This not only simplifies your workflow but also enhances creativity by enabling you to experiment with different layouts and compositions without losing the integrity of your design. Additionally, consider creating reusable templates by grouping commonly used elements, such as logos, icons, and branding elements. This saves time and effort in future projects while ensuring consistency across your designs.
To further optimize your workflow, establish a clear naming convention for your groups, making it easier to identify and locate specific elements within your design. This is particularly useful when working on large or complex projects, where multiple groups and layers can quickly become overwhelming. Another tip is to regularly review and refine your grouping strategy, ensuring that it aligns with your evolving design needs. By incorporating these practices into your workflow, you can maximize the efficiency and effectiveness of Canva’s grouping feature, producing professional-quality designs with ease.
Why Is Grouping Essential for Collaboration in Canva?
Grouping plays a crucial role in facilitating collaboration in Canva by ensuring that all team members can work on the same elements without disrupting the overall design. When collaborating on a project, it’s common for multiple users to access and modify the same design file, which can lead to confusion and errors if not managed properly. By grouping related elements, you can clearly define which parts of the design are connected and should be treated as a single unit. This reduces the risk of accidental changes and streamlines the review and feedback process, ensuring that everyone is on the same page.
Moreover, grouping promotes consistency