Do you need to take apart Dell monitor but aren’t sure where to start? Whether you’re troubleshooting a display issue or upgrading internal components, disassembling a Dell monitor can seem daunting. However, with the right tools, knowledge, and precautions, the process becomes straightforward. This guide dives deep into the step-by-step process of safely taking apart a Dell monitor, ensuring you don’t damage any components or void warranties. By following our expert tips, you’ll gain confidence in handling your monitor's delicate parts.
Modern Dell monitors are designed for both performance and durability, but they can sometimes require maintenance or repair. From replacing a faulty backlight to cleaning dust from the vents, understanding how to take apart Dell monitor correctly is essential. In this article, we’ll cover everything from preparation to reassembly, providing detailed instructions and insider advice to help you tackle the job efficiently.
Whether you're a tech enthusiast looking to upgrade your monitor or a professional seeking troubleshooting techniques, this guide offers all the information you need. We’ll walk you through tools required, common challenges, and safety measures, ensuring you complete the task without unnecessary stress. Let’s dive in!
Read also:Why The Miami Beach Fishing Pier Is A Mustvisit For Every Angler In 2024
Table of Contents
- Introduction
- What Tools Do You Need to Take Apart Dell Monitor?
- How Should You Prepare Before Taking Apart Dell Monitor?
- Step-by-Step Guide to Take Apart Dell Monitor
- What Are Common Issues When Taking Apart Dell Monitor?
- Tips for Reassembling Your Dell Monitor
- Why Are Safety Measures Important When Taking Apart Dell Monitor?
- Troubleshooting Tips for Dell Monitor Disassembly
- Frequently Asked Questions
- Conclusion
What Tools Do You Need to Take Apart Dell Monitor?
Before diving into the process of taking apart Dell monitor, it’s crucial to gather the right tools. Proper tools ensure precision and prevent damage to sensitive components. Here’s a list of essentials you’ll need:
- Phillips-head screwdriver
- Plastic prying tool (to avoid scratching the bezel)
- Anti-static wrist strap
- Small container for screws and small parts
- Tweezers (for handling delicate connectors)
While some monitors may require specialized tools, most Dell monitors use standard screws and clips. An anti-static wrist strap is especially important to protect internal components from electrostatic discharge (ESD). Additionally, organizing screws and small parts in a labeled container will save time during reassembly.
Investing in a quality toolkit is worth it if you plan to perform regular maintenance on electronics. Many tech enthusiasts recommend purchasing a multi-bit screwdriver set, which includes various sizes and types of screwdrivers for different devices.
How Should You Prepare Before Taking Apart Dell Monitor?
Preparation is key to a successful disassembly process. Follow these steps to ensure everything goes smoothly:
- Unplug the monitor: Disconnect the power cable and all peripheral connections. This step minimizes the risk of electrical shock.
- Work in a clean, well-lit area: A clutter-free workspace reduces the chances of losing small parts and ensures better visibility.
- Wear an anti-static wrist strap: This prevents static electricity from damaging internal components.
- Gather all necessary tools: Having everything ready beforehand saves time and frustration.
It’s also helpful to take photos or notes as you remove components. These records can serve as a reference during reassembly. Additionally, ensure your workspace is free of static-prone materials like carpets or woolen fabrics.
Step-by-Step Guide to Take Apart Dell Monitor
Now that you’re prepared, let’s break down the process of taking apart Dell monitor into manageable steps. Each step is designed to minimize the risk of damage while ensuring efficiency.
Read also:Unlocking The Secrets Of 2 To Power Of 3 A Comprehensive Guide
Step 1: Remove the Stand
Most Dell monitors have a detachable stand. Unscrew the stand from the back panel, being careful not to apply excessive force. Place the stand aside in a safe location.
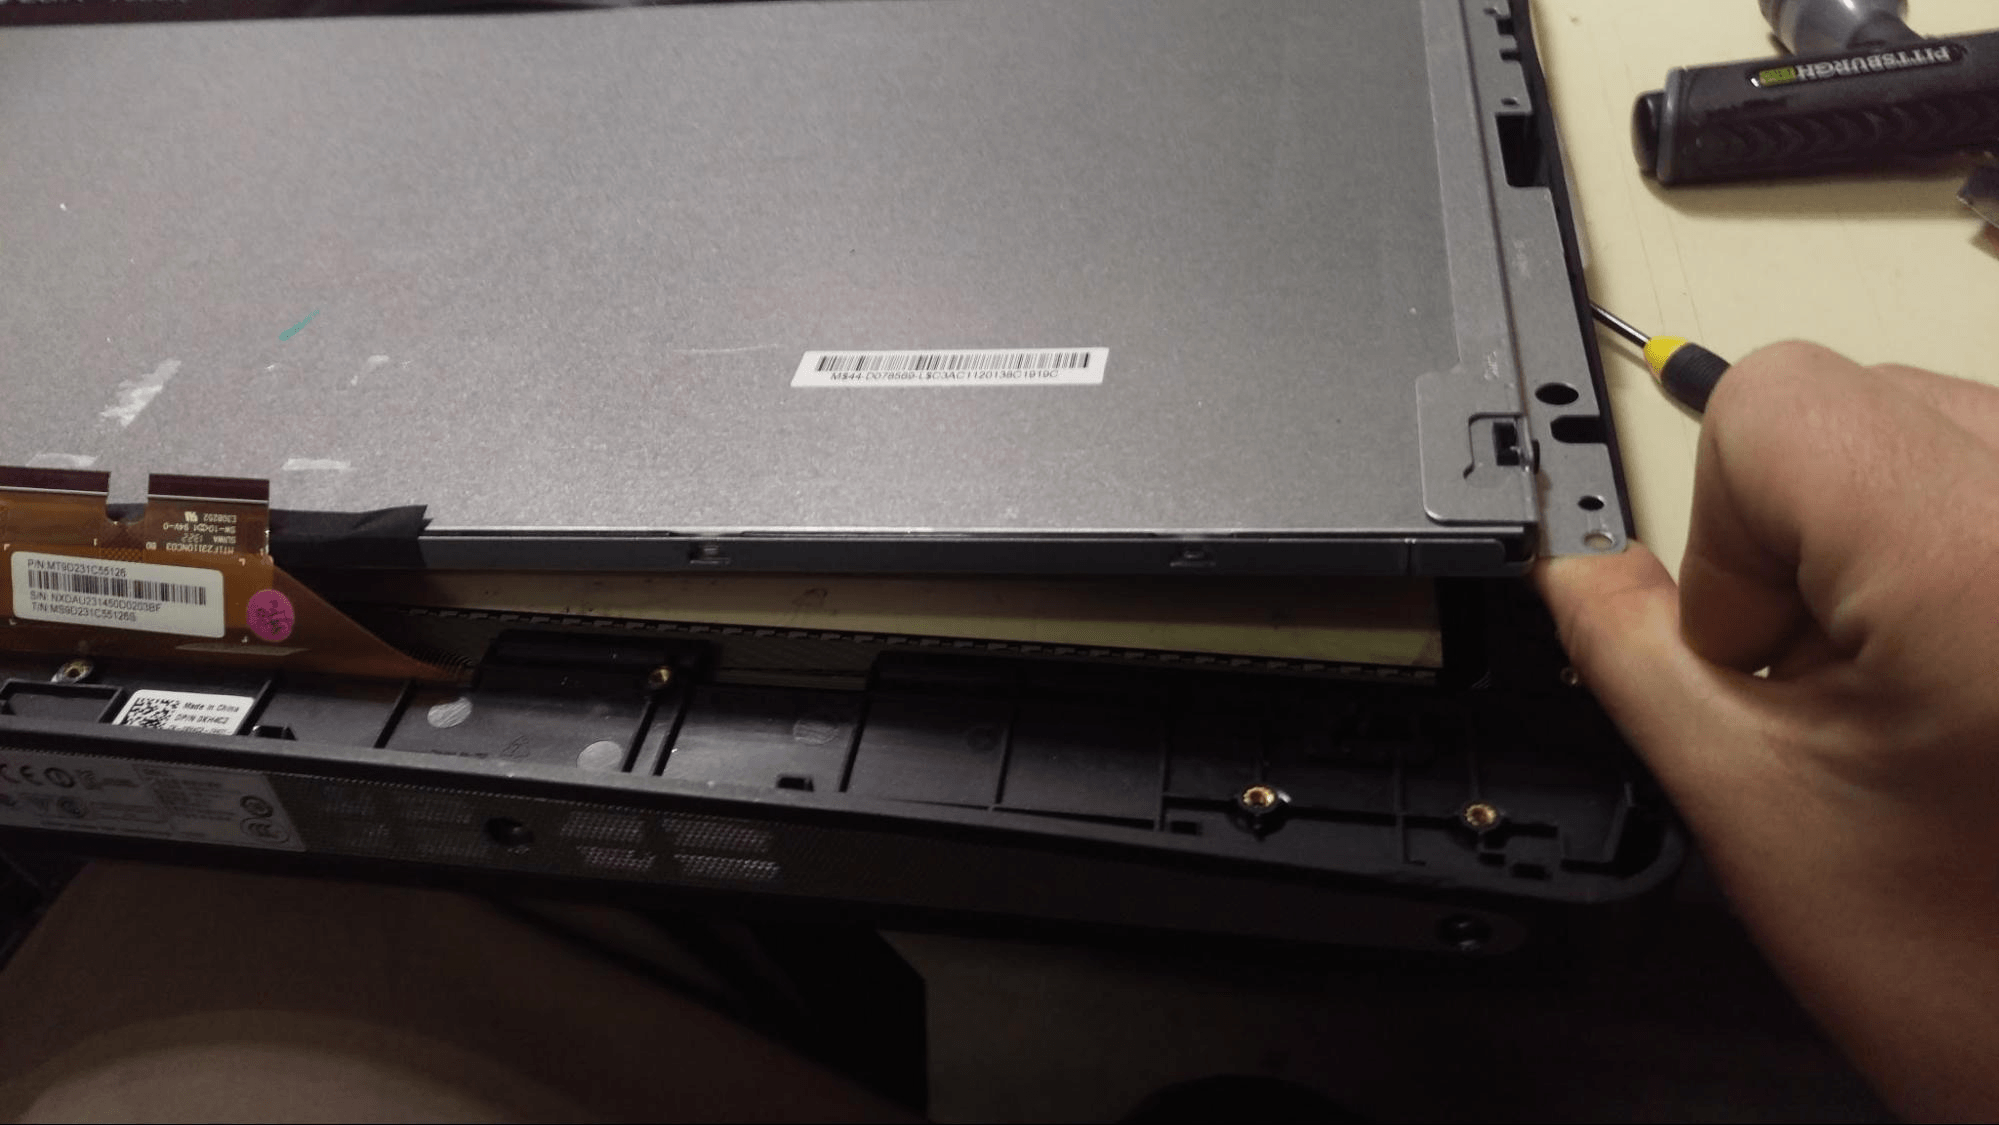
Step 2: Detach the Back Cover
Using a plastic prying tool, gently pry along the edges of the back cover. Be cautious around clips, as they can snap if too much pressure is applied. Once the clips are released, carefully lift the cover off.
Step 3: Disconnect Internal Cables
Locate the internal cables connecting the screen to the motherboard. Use tweezers to unclip connectors gently. Avoid pulling on the wires directly, as this could cause damage.
Continue disassembling layer by layer, documenting each step with photos or notes. This meticulous approach ensures a seamless reassembly process.
What Are Common Issues When Taking Apart Dell Monitor?
Even with careful preparation, certain challenges can arise when taking apart Dell monitor. Here are some common issues and how to address them:
- Broken clips: If a clip snaps during disassembly, consider using super glue to repair it. Alternatively, order replacement parts from Dell support.
- Lost screws: Keep track of screws by organizing them in labeled compartments. Losing screws can complicate reassembly.
- Static damage: Always wear an anti-static wrist strap to prevent ESD. Static electricity can irreparably damage sensitive components.
Staying patient and methodical is the best way to overcome these challenges. Rushing through the process increases the likelihood of mistakes. If you encounter a problem beyond your expertise, consult Dell’s official repair guide or seek professional assistance.
Tips for Reassembling Your Dell Monitor
Reassembly is just as critical as disassembly. Here are some tips to ensure your Dell monitor functions perfectly after reassembly:
- Follow reverse order: Reattach components in the opposite sequence of disassembly. Start with reconnecting internal cables, then secure the back cover, and finally reattach the stand.
- Check connections: Ensure all cables are securely connected before powering on the monitor. Loose connections can cause erratic behavior or failure to boot.
- Test functionality: Once reassembled, power on the monitor to verify it works correctly. Test all features, including resolution, brightness, and input sources.
Reassembly requires attention to detail and patience. Taking your time ensures no components are overlooked or improperly installed.
Why Are Safety Measures Important When Taking Apart Dell Monitor?
Safety should always be a top priority when working with electronics. Here’s why safety measures matter:
Electrostatic discharge (ESD) poses a significant threat to sensitive components inside your Dell monitor. Even a small static charge can damage circuits irreparably. Wearing an anti-static wrist strap neutralizes this risk by grounding your body. Additionally, working in a well-ventilated area prevents inhaling dust or fumes from adhesives.
Another important safety measure is unplugging the monitor entirely before starting. Even residual electricity can pose hazards. Following these precautions ensures both your safety and the integrity of your monitor.
Troubleshooting Tips for Dell Monitor Disassembly
Encountering problems during disassembly is normal, but knowing how to troubleshoot can save time and effort. Here are some practical tips:
Issue: Monitor won’t turn on after reassembly.
Solution: Double-check all internal connections. Ensure the power cable is securely plugged in and the power button is functioning correctly. If the issue persists, test the monitor with a different power source.
Issue: Screen displays artifacts or lines.
Solution: Reconnect the display cable firmly. If the problem continues, inspect the cable for damage. In some cases, the issue may lie with the LCD panel itself, requiring professional repair.
By addressing issues systematically, you can resolve most problems without needing external help.
Frequently Asked Questions
Can I Take Apart Dell Monitor Without Voiding Warranty?
While opening your Dell monitor might void the warranty, it depends on the specific model and warranty terms. Always check Dell’s official documentation before proceeding. Some models include user-serviceable components that won’t affect warranty status.
How Long Does It Take to Take Apart Dell Monitor?
The duration varies based on experience and the complexity of the monitor. On average, it takes 30 minutes to an hour for beginners. With practice, the process becomes quicker and more efficient.
Where Can I Find Replacement Parts for Dell Monitor?
Dell offers genuine replacement parts through their official website or authorized service centers. For budget-conscious users, third-party suppliers also provide compatible components, though quality may vary.
Conclusion
Taking apart Dell monitor is a rewarding task that empowers you to perform maintenance or upgrades confidently. By following the steps outlined in this guide, you’ll gain the skills and knowledge needed to tackle the job effectively. Remember to prioritize safety, preparation, and patience throughout the process.
Whether you’re troubleshooting a hardware issue or simply curious about how your monitor works, this guide equips you with the tools and confidence to succeed. Happy tinkering!
![[help] How to take apart Dell P2417H monitor? r/Monitors](https://external-preview.redd.it/MXPncWfTButzt87lXpOSudSAlCycgO3_zy2Fz-Sz0QY.jpg?auto=webp&s=78b6e4b388a56cc74e0a87363a0d3202ddab6d78)