Self-leveling concrete has become an increasingly popular choice for homeowners and contractors alike. It offers a quick, efficient, and cost-effective solution for achieving smooth, flat surfaces in various applications. Whether you're working on a residential or commercial project, understanding how to use self leveling concrete can make all the difference in ensuring a professional finish. This versatile material is ideal for repairing uneven floors, smoothing out rough surfaces, and creating a solid foundation for flooring installations. In this article, we’ll delve into everything you need to know about self-leveling concrete, including preparation tips, application techniques, and troubleshooting common issues.
When it comes to leveling floors, traditional methods often involve labor-intensive processes that can be time-consuming and costly. However, with advancements in technology, self-leveling concrete provides a seamless alternative that simplifies the process. Its ability to flow and spread evenly across surfaces makes it an excellent choice for both DIY enthusiasts and professional builders. By mastering how to use self leveling concrete, you can achieve professional results while saving time and money.
Before diving into the specifics of using self-leveling concrete, it’s important to understand its benefits and limitations. This material is ideal for creating smooth, flat surfaces but requires careful preparation and attention to detail during application. Whether you’re working on a small bathroom renovation or a large industrial space, knowing how to properly use self leveling concrete can help you achieve the desired outcome. Let’s explore the steps involved in this process and uncover valuable insights to ensure your project is a success.
Read also:Ultimate Guide How To Get A Stain Out Of White Shirt With Proven Methods
What Is Self-Leveling Concrete and Why Should You Use It?
Self-leveling concrete is a specialized type of cementitious material designed to flow and spread evenly across surfaces, creating a smooth, flat finish. Unlike traditional concrete, which requires manual leveling and finishing, self-leveling concrete eliminates the need for troweling and smoothing by leveraging its fluid consistency. This makes it an ideal choice for a variety of applications, from residential flooring to commercial spaces. By understanding the properties and advantages of self-leveling concrete, you can better appreciate why it’s become a go-to solution for modern construction projects.
One of the primary reasons to consider using self-leveling concrete is its ability to save time and labor. Traditional concrete installation often involves multiple steps, including leveling, smoothing, and finishing, which can be both time-consuming and costly. Self-leveling concrete simplifies this process by flowing naturally into low spots and filling gaps, resulting in a perfectly level surface. Additionally, it provides a durable and stable foundation for various flooring options, such as tile, hardwood, and carpet, enhancing the longevity and appearance of your space.
Another advantage of self-leveling concrete is its versatility. It can be used on a wide range of substrates, including concrete, wood, and vinyl, making it suitable for both new construction and renovation projects. Its ability to bond effectively with different surfaces ensures a secure and long-lasting finish. Furthermore, self-leveling concrete is available in various formulations, allowing you to choose the right product for your specific needs, whether you require a fast-setting option or one that offers enhanced durability.
How Does Self-Leveling Concrete Work?
The magic of self-leveling concrete lies in its unique formulation, which combines finely ground cement, aggregates, and specialized additives. These components work together to create a highly fluid mixture that flows easily across surfaces, filling in gaps and low spots to achieve a perfectly level finish. The additives incorporated into the mix enhance its workability, adhesion, and curing properties, ensuring optimal performance under various conditions. Understanding how self-leveling concrete works can help you appreciate its effectiveness and make informed decisions when selecting the right product for your project.
When applied, self-leveling concrete spreads evenly due to its low viscosity, allowing it to flow into uneven areas and create a uniform surface. As it cures, the material hardens and bonds securely to the substrate, providing a stable and durable foundation. This process eliminates the need for manual leveling tools, reducing the risk of human error and ensuring consistent results. Additionally, the curing time for self-leveling concrete is relatively short, allowing you to proceed with subsequent steps in your project more quickly.
What Are the Benefits of Using Self-Leveling Concrete?
Using self-leveling concrete offers numerous benefits that make it an attractive option for both professionals and DIY enthusiasts. Firstly, it significantly reduces labor costs and project timelines by eliminating the need for manual leveling and finishing. This not only saves time but also minimizes the potential for errors, resulting in a more precise and professional finish. Secondly, self-leveling concrete provides a superior bonding surface for various flooring materials, enhancing their durability and appearance.
Read also:Discover The Ultimate Guide How To Get Toned Arms Women Will Love
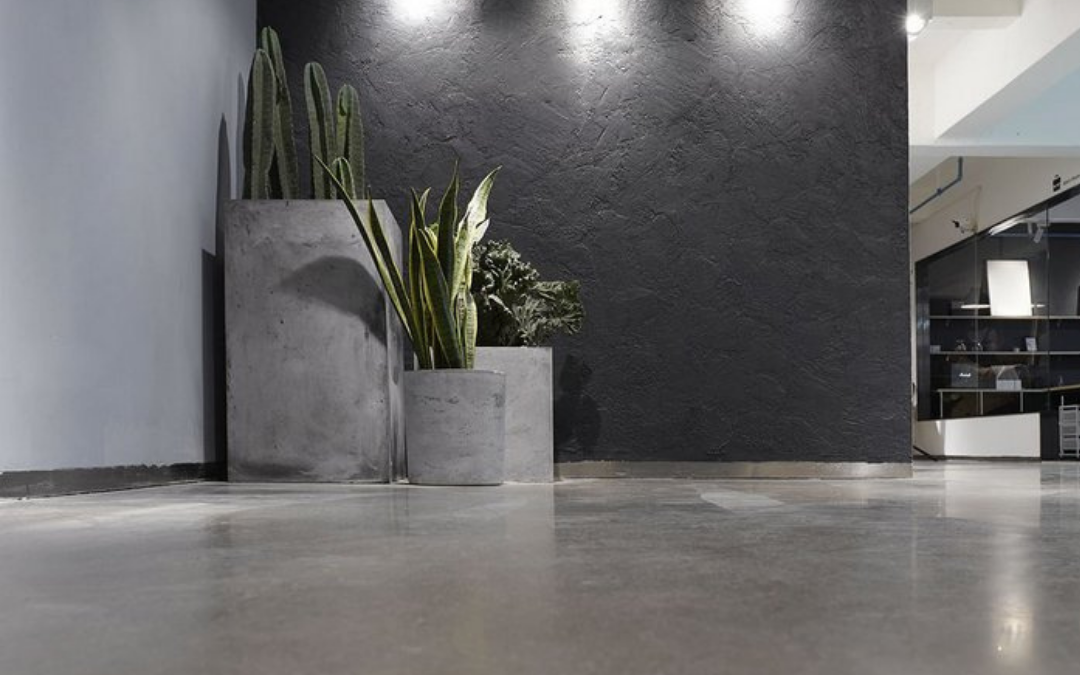
Another key advantage of self-leveling concrete is its ability to improve the structural integrity of floors. By filling in gaps and low spots, it creates a solid, even surface that distributes weight more evenly, reducing the risk of cracking or damage over time. Additionally, its smooth finish enhances the aesthetic appeal of your space, making it an ideal choice for high-traffic areas. Lastly, self-leveling concrete is environmentally friendly, as it produces minimal waste during application and requires fewer resources compared to traditional concrete methods.
How to Prepare for Using Self-Leveling Concrete?
Before you begin the application process, proper preparation is crucial to ensure the success of your project. Preparing the surface involves several steps, including cleaning, priming, and addressing any underlying issues. Neglecting this phase can lead to poor adhesion, uneven results, or even complete failure of the self-leveling concrete. By following a systematic approach, you can create the ideal conditions for achieving a flawless finish.
Start by thoroughly cleaning the surface to remove any dirt, dust, grease, or debris. Use a broom or vacuum to eliminate loose particles, and consider using a degreaser if the surface is particularly dirty or oily. Once the surface is clean, inspect it for cracks, holes, or other imperfections that may affect the final result. Address these issues by filling them with a suitable repair compound and allowing it to cure before proceeding. This step ensures a smooth and even base for the self-leveling concrete.
Next, apply a bonding primer to the prepared surface. The primer enhances adhesion between the self-leveling concrete and the substrate, ensuring a secure bond. It also helps to seal the surface, preventing the self-leveling concrete from absorbing too much moisture during application. Follow the manufacturer’s instructions for application and curing times, as this will vary depending on the product you choose. Proper preparation not only improves the performance of the self-leveling concrete but also contributes to the longevity and durability of your project.
What Tools Do You Need for Applying Self-Leveling Concrete?
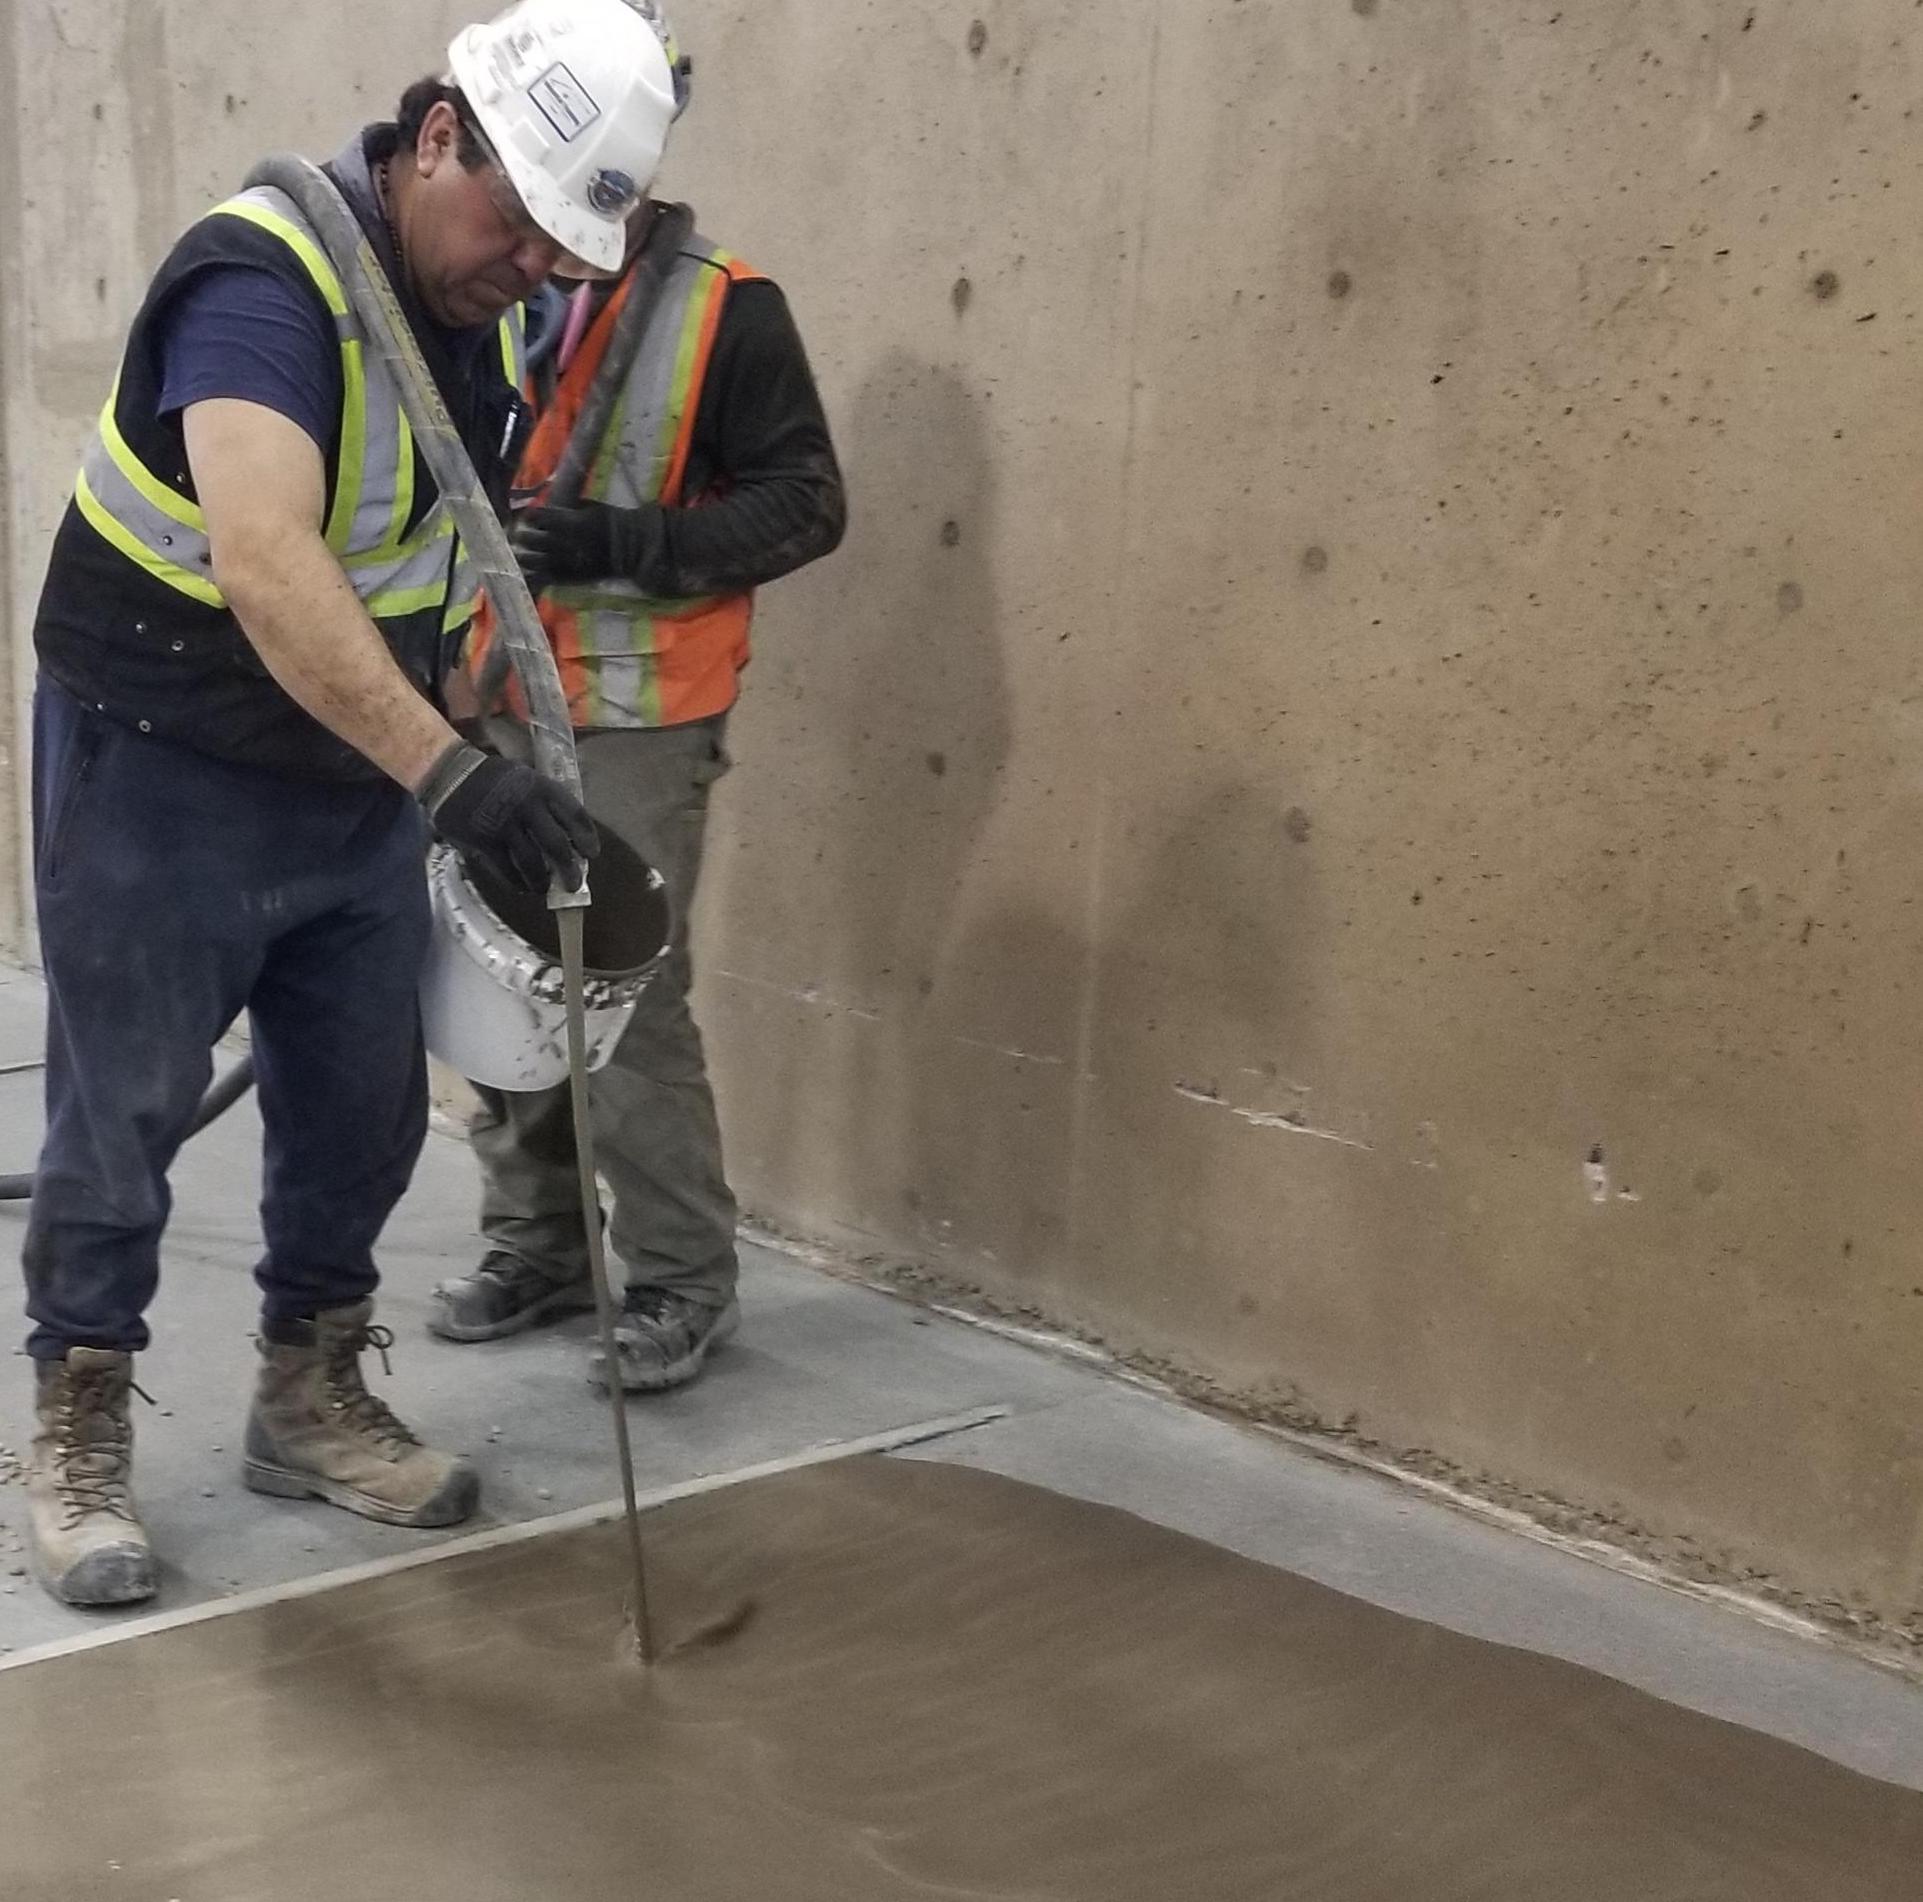
Having the right tools on hand is essential for a successful self-leveling concrete application. While the process may seem straightforward, using the appropriate equipment can make a significant difference in achieving professional results. Some of the key tools you’ll need include a mixing container, drill mixer, trowel, and squeegee. Additionally, you may require a moisture meter to ensure the substrate is dry enough for application and a level to verify the evenness of the finished surface.
When mixing self-leveling concrete, a large bucket or mixing container is necessary to accommodate the required volume of material. A drill mixer with a paddle attachment ensures thorough and consistent mixing, reducing the risk of air bubbles or clumps. Once mixed, use a squeegee to spread the material across the surface, ensuring even coverage and flow. A trowel can be used to smooth out any remaining imperfections and create a polished finish. Investing in high-quality tools will not only make the process easier but also improve the overall quality of your work.
What Are the Common Mistakes to Avoid When Preparing the Surface?
While preparing the surface for self-leveling concrete application, there are several common mistakes to avoid. Neglecting to clean the surface thoroughly can lead to poor adhesion and uneven results. Similarly, failing to address cracks or holes before applying the material can compromise the structural integrity of the floor. Another common error is skipping the priming step, which can result in the self-leveling concrete pulling away from the substrate or curing improperly.
It’s also important to ensure the surface is dry and free of moisture before proceeding. Applying self-leveling concrete to a damp or wet surface can cause the material to cure unevenly or fail altogether. Additionally, failing to follow the manufacturer’s instructions for mixing and application can lead to subpar results. By avoiding these common mistakes and adhering to best practices, you can ensure a successful and durable finish for your project.
Step-by-Step Guide: How to Use Self Leveling Concrete
Now that you’ve prepared the surface and gathered the necessary tools, it’s time to apply the self-leveling concrete. This step-by-step guide will walk you through the entire process, from mixing the material to achieving a flawless finish. By following these instructions carefully, you can ensure a professional result that meets your project requirements.
Begin by mixing the self-leveling concrete according to the manufacturer’s instructions. Use a clean mixing container and a drill mixer with a paddle attachment to ensure thorough blending. Gradually add water to the dry mix, stirring continuously until a smooth, lump-free consistency is achieved. Be sure not to add too much water, as this can weaken the material and affect its performance. Once mixed, allow the material to sit for a few minutes to eliminate any air bubbles that may have formed during the mixing process.
Next, pour the self-leveling concrete onto the prepared surface in small sections, working systematically across the area. Use a squeegee to spread the material evenly, ensuring it flows into all low spots and gaps. Work quickly but carefully, as the material begins to set relatively fast. Once the entire surface is covered, use a trowel to smooth out any remaining imperfections and create a polished finish. Allow the self-leveling concrete to cure according to the manufacturer’s recommendations before proceeding with subsequent steps, such as installing flooring or applying a sealant.
How Long Does It Take for Self-Leveling Concrete to Cure?
The curing time for self-leveling concrete can vary depending on factors such as temperature, humidity, and the specific product formulation. Generally, most self-leveling concrete products require 24 to 48 hours to cure before you can walk on the surface or proceed with additional work. However, it’s important to follow the manufacturer’s guidelines, as some products may require longer curing times for optimal performance.
During the curing process, avoid exposing the self-leveling concrete to excessive moisture, as this can affect its strength and durability. Similarly, protect the surface from heavy foot traffic or equipment until it has fully cured. If you’re working in a high-humidity environment, consider using fans or dehumidifiers to accelerate the drying process. By allowing sufficient time for the material to cure, you can ensure a strong and durable finish that meets your project requirements.
What Are the Best Practices for Achieving a Smooth Finish?
Achieving a smooth finish with self-leveling concrete requires attention to detail and adherence to best practices throughout the application process. Start by ensuring the surface is properly prepared, as any imperfections or contaminants can affect the final result. Use a high-quality squeegee to spread the material evenly, working systematically across the area to avoid leaving any gaps or overlaps. Additionally, maintain a consistent thickness throughout the application to ensure uniformity.
After spreading the self-leveling concrete, use a trowel to smooth out any remaining imperfections and create a polished finish. Work quickly but carefully, as the material begins to set relatively fast. If air bubbles or streaks appear during application, use a brush or roller to gently remove them, ensuring a flawless surface. Finally, allow the material to cure fully before proceeding with additional work, as this will contribute to the longevity and durability of your project.
How to Troubleshoot Common Issues with Self-Leveling Concrete?
Despite careful preparation and application, issues can sometimes arise when working with self-leveling concrete. Understanding how to troubleshoot these problems can help you address them promptly and effectively, ensuring the success of your project. Some of the most common issues include uneven surfaces, air bubbles, and improper curing. By identifying the root cause of these problems, you can implement the appropriate solutions and achieve the desired results.
If you notice uneven surfaces after applying self-leveling concrete, it may be due to improper mixing or insufficient spreading. Check the consistency of the mix and ensure it’s smooth and free of lumps. Additionally, verify that you’ve spread the material evenly across the surface, paying close attention to low spots and gaps. Air bubbles can be addressed by gently brushing or rolling the surface during application, while improper curing may require adjusting environmental conditions such as temperature and humidity.
What Causes Uneven Surfaces and How Can You Fix Them?
Uneven surfaces are one of the most common issues encountered when using self-leveling concrete. Several factors can contribute to this problem, including improper mixing, insufficient spreading, or inadequate surface preparation. To fix uneven surfaces, start by inspecting the mix for consistency and ensuring it’s smooth and lump-free. Next, verify that you’ve spread the material evenly across the surface, paying close attention to low spots and gaps. If necessary, use additional material to fill in any remaining imperfections.
In some cases, uneven surfaces may result from underlying issues such as cracks or holes in the substrate. Address these problems by filling them with a suitable repair compound and allowing it to cure before reapplying the self-leveling concrete. Additionally, ensure the surface is clean and free of contaminants that may affect adhesion. By identifying and addressing the root cause of uneven surfaces, you can achieve a smooth and professional finish for your project.
How Can You Prevent Air Bubbles During Application?
Air bubbles are another common issue that can affect the appearance and performance of