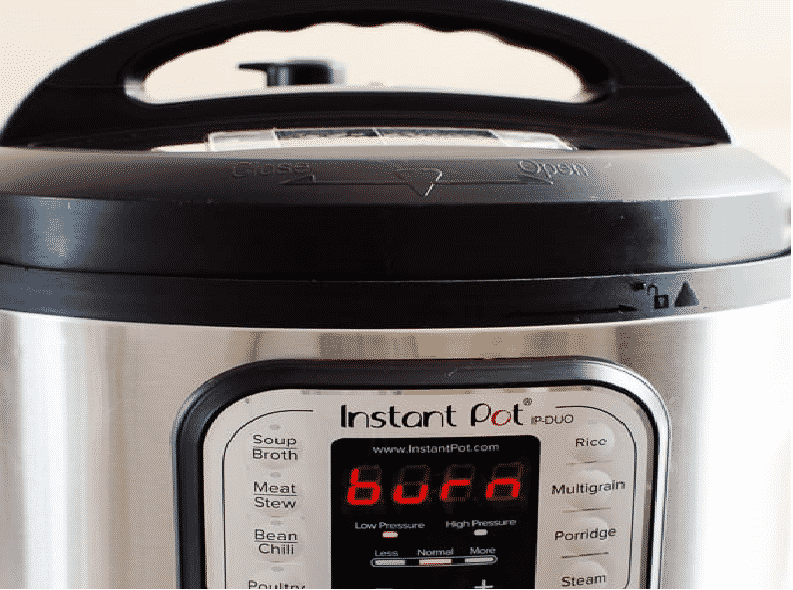
Are you frustrated with your Instant Pot not sealing properly? If your pressure cooker isn’t holding its seal, it could lead to uneven cooking, longer cook times, or even prevent the device from reaching pressure at all. This common issue can stem from various causes, ranging from improper lid placement to damaged gaskets. Fortunately, most sealing problems are easy to identify and fix with some simple troubleshooting steps. In this article, we’ll explore the top reasons why your Instant Pot might not be sealing and provide actionable solutions to restore its functionality. Whether you're a seasoned pressure cooking enthusiast or a beginner just starting out, understanding how to maintain your Instant Pot is key to getting the most out of this versatile kitchen appliance.
Pressure cooking has revolutionized the way we prepare meals, offering convenience, speed, and flavor all in one compact device. However, when your Instant Pot fails to seal properly, it can disrupt your cooking experience. A properly sealed Instant Pot ensures that steam builds up inside the pot, creating the high-pressure environment necessary for efficient cooking. Without a good seal, your food may not cook evenly, or worse, the cooking process may not start at all. Understanding why your Instant Pot isn’t sealing can save you time and frustration, allowing you to enjoy delicious, home-cooked meals with minimal effort.
In this comprehensive guide, we’ll delve into the reasons behind sealing issues, provide detailed troubleshooting steps, and offer expert tips to help you maintain your Instant Pot for optimal performance. By the end of this article, you’ll have a clear understanding of how to diagnose and resolve common sealing problems, ensuring your Instant Pot continues to deliver exceptional results every time you use it. Let’s dive in and uncover the secrets to a perfectly sealed Instant Pot!
Read also:Top Free Activities In Houston Exploring The City Without Breaking The Bank
Table of Contents
- Why Won't My Instant Pot Seal? Understanding the Basics
- What Are the Common Causes of Sealing Issues?
- How Can You Check the Gasket for Damage?
- Is the Lid Seating Properly?
- Could Vent Blockage Be the Culprit?
- What About the Anti-Block Shield?
- Steps to Troubleshoot and Fix Sealing Problems
- FAQs About Instant Pot Sealing Issues
Why Won't My Instant Pot Seal? Understanding the Basics
The question "why won't my Instant Pot seal?" often arises when users notice their pressure cooker isn't functioning as expected. At its core, an Instant Pot relies on creating a sealed environment to build pressure and cook food efficiently. When the seal is compromised, the device cannot reach the necessary pressure levels, leading to inconsistent or incomplete cooking. To address this issue, it's essential to understand the fundamental components involved in maintaining a proper seal.
The Instant Pot's sealing system primarily involves the lid, gasket (or sealing ring), and venting mechanisms. The gasket, a rubber ring that fits around the inner pot, plays a crucial role in creating an airtight environment. If the gasket is damaged, worn out, or improperly installed, it can lead to sealing problems. Additionally, the lid must sit correctly on the base to ensure a tight fit. Even a small misalignment can prevent the Instant Pot from sealing effectively. Lastly, the vent system, including the steam release valve and anti-block shield, must remain clear and unobstructed to allow the device to regulate pressure properly.
By familiarizing yourself with these components and their functions, you'll be better equipped to identify and resolve sealing issues. Regular maintenance and proper usage can significantly reduce the likelihood of encountering problems, ensuring your Instant Pot continues to operate smoothly. Let's explore the common causes of sealing issues in more detail to pinpoint potential problems and their solutions.
What Are the Common Causes of Sealing Issues?
Sealing issues in an Instant Pot can stem from a variety of factors, many of which are straightforward to diagnose and fix. One of the most frequent culprits is a damaged or worn-out gasket. Over time, the gasket can degrade due to repeated use, exposure to high heat, or improper cleaning. Cracks, tears, or warping in the gasket can prevent it from forming an airtight seal, leading to pressure leaks. Another common cause is improper lid placement. If the lid isn't securely locked onto the base, the Instant Pot won't seal correctly, resulting in failed pressure buildup.
Blockages in the venting system are also a significant contributor to sealing problems. Food particles, debris, or mineral deposits can accumulate in the steam release valve or anti-block shield, obstructing the flow of steam and disrupting the pressure regulation process. Additionally, using incompatible accessories, such as oversized steam racks or improperly sized sealing rings, can interfere with the Instant Pot's ability to maintain a proper seal. By addressing these potential issues, you can restore your Instant Pot's sealing capabilities and enjoy consistent cooking results.
In some cases, sealing problems may arise from user error, such as overfilling the pot or neglecting routine maintenance tasks. Overfilling the Instant Pot can cause food to spill into the venting system during cooking, leading to blockages and sealing issues. Similarly, failing to clean the device regularly can result in the buildup of residue that compromises its functionality. Understanding these common causes and taking preventive measures can help you avoid sealing problems and extend the lifespan of your Instant Pot.
Read also:Why Does My Macbook Screen Have Lines A Comprehensive Guide To Diagnosing And Fixing Display Issues
How Can You Check the Gasket for Damage?
One of the first steps in troubleshooting an Instant Pot sealing issue is inspecting the gasket for signs of damage. Begin by removing the gasket from the lid and examining it closely for cracks, tears, or warping. Pay particular attention to areas that come into direct contact with the base of the pot, as these are more susceptible to wear and tear. If you notice any visible damage, it's likely that the gasket is the source of the sealing problem and needs to be replaced.
In addition to visual inspection, you can perform a simple test to assess the gasket's condition. Stretch the gasket gently to check for flexibility and elasticity. A healthy gasket should return to its original shape without showing signs of stiffness or brittleness. If the gasket feels hard or brittle, it may have lost its ability to create a proper seal and should be replaced. Regularly replacing the gasket every 6 to 12 months, depending on usage, can prevent sealing issues and ensure optimal performance.
When replacing the gasket, ensure you purchase a genuine or compatible replacement part from a trusted source. Using low-quality or counterfeit gaskets can lead to further sealing problems and compromise the safety of your Instant Pot. Once you've installed the new gasket, test the seal by running a short cooking cycle to confirm that the device reaches and maintains pressure successfully.
Is the Lid Seating Properly?
Proper lid seating is another critical factor in ensuring a secure seal for your Instant Pot. To check if the lid is seating correctly, start by ensuring that the lid is aligned with the base before locking it into place. The lid should click securely into position, with the handles aligned and the locking mechanism engaged. If the lid feels loose or doesn't lock properly, it may indicate a problem with the lid or base alignment.
Another potential issue is the presence of food residue or debris between the lid and the base, which can prevent the lid from seating properly. Clean both the lid and base thoroughly, paying special attention to the sealing groove where the gasket sits. Use a soft brush or cloth to remove any buildup that might interfere with the seal. Regular cleaning and maintenance of these components can help prevent sealing issues caused by improper lid seating.
Lastly, ensure that the Instant Pot's lid is in good condition and free from damage. Check for any signs of warping, cracks, or other defects that might affect its ability to form a tight seal. If you notice any issues with the lid, consider replacing it to restore proper functionality. By verifying that the lid seats correctly and maintaining its condition, you can significantly reduce the likelihood of encountering sealing problems.
Could Vent Blockage Be the Culprit?
Vent blockage is a common yet often overlooked cause of sealing issues in Instant Pots. When the steam release valve or anti-block shield becomes clogged with food particles, debris, or mineral deposits, it can disrupt the pressure regulation process and prevent the device from sealing effectively. To determine if vent blockage is the source of your sealing problem, inspect these components closely for any signs of obstruction.
Begin by removing the steam release valve and checking it for debris. Use a small brush or toothpick to gently clean out any buildup, being careful not to damage the valve's delicate components. Next, examine the anti-block shield for any food particles or residue that might be blocking the vent. If you notice any blockages, clean the shield thoroughly with warm water and a soft brush to remove the debris.
In addition to regular cleaning, consider descaling your Instant Pot periodically to remove mineral deposits that can contribute to vent blockage. Use a mixture of white vinegar and water, following the manufacturer's instructions, to safely and effectively descale the device. By keeping the venting system clear and free from obstructions, you can ensure that your Instant Pot seals properly and operates efficiently.
What About the Anti-Block Shield?
The anti-block shield is an essential component of the Instant Pot's venting system, designed to prevent food particles from entering the steam release valve and causing blockages. However, even the anti-block shield can become clogged over time, leading to sealing issues. To check the condition of your anti-block shield, remove it from the lid and inspect it for any signs of food residue or debris.
If you notice any buildup on the anti-block shield, clean it thoroughly with warm water and a soft brush to remove the debris. Pay special attention to the small holes and openings in the shield, as these are more prone to blockages. Once cleaned, reinstall the anti-block shield and test the seal by running a short cooking cycle to ensure that the Instant Pot reaches and maintains pressure successfully.
Regularly cleaning and maintaining the anti-block shield can help prevent sealing issues and ensure the proper functioning of your Instant Pot. Incorporating this task into your routine maintenance schedule can save you time and frustration in the long run, allowing you to enjoy consistent and reliable cooking results.
Steps to Troubleshoot and Fix Sealing Problems
Now that we've covered the common causes of sealing issues in Instant Pots, let's explore a step-by-step guide to troubleshooting and fixing these problems. Start by identifying the potential source of the issue, beginning with the gasket. Inspect the gasket for damage, and replace it if necessary. Next, check the lid seating to ensure it aligns correctly with the base and locks securely into place. Clean both the lid and base thoroughly to remove any food residue or debris that might interfere with the seal.
After addressing the gasket and lid, move on to the venting system. Inspect the steam release valve and anti-block shield for blockages, cleaning them as needed to remove any obstructions. If you suspect mineral deposits are contributing to the problem, descale your Instant Pot using a mixture of white vinegar and water. Finally, test the seal by running a short cooking cycle to confirm that the device reaches and maintains pressure successfully.
By following these steps, you can systematically identify and resolve sealing issues, restoring your Instant Pot's functionality and ensuring consistent cooking results. Remember to incorporate regular maintenance tasks into your routine to prevent future problems and extend the lifespan of your device. With a little care and attention, your Instant Pot will continue to deliver delicious, home-cooked meals for years to come.
FAQs About Instant Pot Sealing Issues
How Often Should I Replace the Gasket?
Replacing the gasket every 6 to 12 months, depending on usage, is generally recommended to maintain optimal sealing performance. Signs that it's time to replace the gasket include cracks, tears, warping, or loss of flexibility. Using a worn-out gasket can lead to sealing issues and compromise the safety of your Instant Pot.
Can I Use Dish Soap to Clean the Gasket?
Yes, you can use mild dish soap and warm water to clean the gasket. Avoid using harsh chemicals or abrasive cleaners, as these can damage the gasket and affect its ability to create a proper seal. Gently scrub the gasket with a soft brush or cloth, rinse thoroughly, and allow it to air dry before reinstalling.
Why Does My Instant Pot Leak Steam?
Steam leaks in an Instant Pot are often caused by sealing issues, such as a damaged gasket, improper lid seating, or vent blockage. Inspect these components for signs of damage or obstruction and address any problems you find. Regular maintenance and proper usage can help prevent steam leaks and ensure your Instant Pot operates efficiently.
Conclusion
Understanding why your Instant Pot won't seal is essential for maintaining its performance and ensuring consistent cooking results. By identifying common causes of sealing issues, such as damaged gaskets, improper lid seating, or vent blockages, you can take proactive steps to resolve these problems and restore your device's functionality. Incorporating regular maintenance tasks into your routine, such as cleaning the gasket, lid, and venting system, can help prevent future issues and extend the lifespan of your Instant Pot.
With the right knowledge and tools, troubleshooting and fixing sealing problems becomes a straightforward process. By following the steps outlined in this article, you'll be well-equipped to diagnose and resolve any sealing issues that may arise, allowing you to enjoy the convenience and versatility of your Instant Pot with confidence. So, the next