Proofing bread in oven is a technique that has revolutionized the way home bakers create soft, fluffy loaves with professional results. Whether you're a seasoned baker or a newcomer to the world of bread-making, understanding how to proof bread in an oven can elevate your skills to the next level. This method not only saves time but also ensures consistent results, making it a game-changer for those who want to perfect their bread-baking craft. By harnessing the warmth and controlled environment of your oven, you can create the ideal conditions for yeast to ferment and dough to rise, resulting in bakery-quality bread every time.
With the rise of home baking during the pandemic and the increasing popularity of artisanal bread, many people are turning to advanced techniques to improve their baking. Proofing bread in oven offers a practical solution for those who don’t have access to professional proofing equipment. This technique is especially useful during colder months when maintaining a consistent temperature in your kitchen can be challenging. By using your oven as a proofing chamber, you can replicate the conditions of a commercial proofer, ensuring your dough rises evenly and develops the perfect texture.
This guide will delve deep into the science behind proofing bread in oven, providing step-by-step instructions, troubleshooting tips, and expert advice to help you master this technique. Whether you're baking sourdough, brioche, or a simple white loaf, the principles outlined here will apply across a wide range of recipes. By the end of this article, you'll have the knowledge and confidence to incorporate this method into your baking routine, taking your bread-making skills to new heights.
Read also:Can Puppies Have Sweet Potatoes A Comprehensive Guide For Puppy Owners
Table of Contents
- Introduction to Proofing Bread in Oven
- What Are the Benefits of Proofing Bread in Oven?
- How Does Proofing Bread in Oven Work?
- Why Should You Choose Proofing Bread in Oven Over Traditional Methods?
- Step-by-Step Guide to Proofing Bread in Oven
- What Equipment Do You Need for Proofing Bread in Oven?
- Tips and Tricks for Perfect Proofing
- Common Mistakes to Avoid When Proofing Bread in Oven
- Frequently Asked Questions
- Conclusion
Introduction to Proofing Bread in Oven
Proofing bread in oven is a technique that involves using your oven as a controlled environment to allow dough to rise before baking. This method is particularly effective because ovens provide a consistent and stable temperature, which is crucial for yeast activity. Unlike traditional proofing methods that rely on ambient kitchen temperatures, proofing bread in oven ensures that your dough rises evenly, regardless of external conditions. This is especially beneficial for bakers living in regions with fluctuating temperatures or during seasons when maintaining warmth is challenging.
One of the key advantages of proofing bread in oven is the ability to customize the environment to suit your specific needs. By adjusting the temperature and humidity levels, you can create the perfect conditions for different types of bread. For example, sourdough requires a slightly warmer and more humid environment compared to other types of bread, and proofing in an oven allows you to achieve this with precision. Additionally, this method eliminates the guesswork involved in traditional proofing, where factors like drafts or temperature fluctuations can affect the outcome.
Incorporating proofing bread in oven into your baking routine can significantly improve the quality of your bread. Not only does it enhance the texture and flavor, but it also ensures that your loaves rise consistently, resulting in a more professional appearance. As you explore this technique further, you'll discover how it can transform your baking experience and elevate your skills to new heights.
What Are the Benefits of Proofing Bread in Oven?
Proofing bread in oven offers several advantages over traditional methods, making it a popular choice among both amateur and professional bakers. One of the primary benefits is the ability to control the temperature and humidity levels, which are critical for optimal yeast activity. By setting your oven to a low temperature and using a bowl of water to create steam, you can replicate the conditions of a professional proofing box. This ensures that your dough rises evenly and develops the desired texture and flavor.
Another significant advantage is the consistency it provides. Unlike relying on ambient kitchen temperatures, which can vary depending on the time of day or season, proofing bread in oven offers a stable environment. This is particularly important for bakers who live in regions with extreme weather conditions, where maintaining a consistent temperature can be challenging. By using your oven as a proofing chamber, you can ensure that your dough rises properly, regardless of external factors.
Furthermore, proofing bread in oven saves time and effort. Instead of waiting for your dough to rise in a warm spot in your kitchen, which can be unpredictable, you can set up your oven and let it do the work for you. This method also reduces the risk of over-proofing or under-proofing, which can occur when relying on ambient conditions. As a result, you can achieve better results with less effort, making it an ideal technique for busy bakers who want to streamline their process.
Read also:Understanding Measurement How Many Ounces Is In 2 Cups And Beyond
How Can Proofing Bread in Oven Improve Bread Texture?
One of the most noticeable improvements when proofing bread in oven is the enhancement in texture. The controlled environment of an oven allows for a more consistent rise, resulting in a lighter and airier crumb structure. This is particularly important for bread types that require a delicate texture, such as brioche or challah. By maintaining the right temperature and humidity levels, you can ensure that the gluten structure develops properly, leading to a more tender and flavorful loaf.
Additionally, proofing bread in oven can improve the crust quality. The steam created by the bowl of water helps to keep the surface of the dough moist during the proofing process, which can lead to a crispier crust after baking. This is especially beneficial for bread types like baguettes or ciabatta, where a crunchy crust is desirable. By incorporating this method into your baking routine, you can achieve professional-quality results without the need for expensive equipment.
Can Proofing Bread in Oven Enhance Flavor?
Absolutely! Proofing bread in oven can enhance the flavor of your bread by allowing for a more extended and controlled fermentation process. Yeast thrives in a warm, humid environment, and by providing these conditions, you can encourage the development of complex flavors. This is particularly important for sourdough bread, where the fermentation process plays a crucial role in flavor development. By proofing your dough in an oven, you can ensure that the yeast has enough time to break down the sugars in the dough, resulting in a more flavorful loaf.
How Does Proofing Bread in Oven Work?
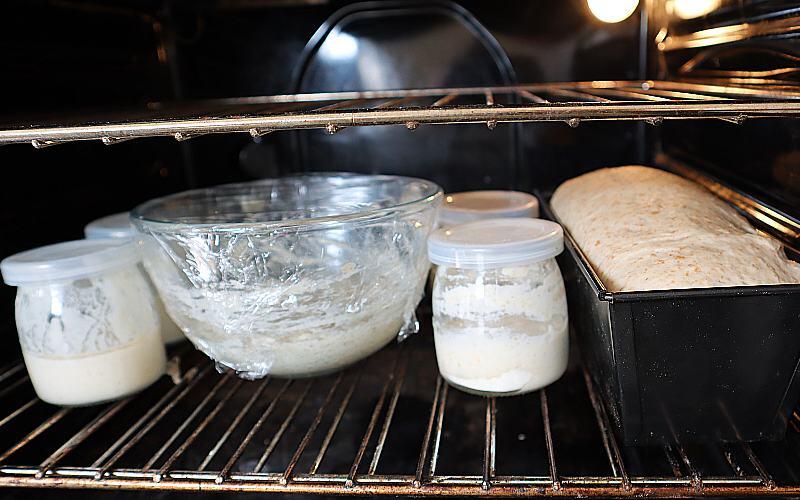
Proofing bread in oven works by creating a controlled environment that mimics the conditions of a professional proofing box. The process begins by preheating your oven to a low temperature, typically between 80°F and 110°F (27°C to 43°C), depending on the type of bread you're making. This temperature range is ideal for yeast activity, as it allows the yeast to ferment and produce carbon dioxide, which helps the dough rise. To maintain humidity, a bowl of hot water is placed on the bottom rack of the oven, creating steam that prevents the dough from drying out during the proofing process.
Once the oven is preheated, the dough is placed on the middle rack, either in a covered container or directly on a baking sheet. The bowl of water is placed on the bottom rack, ensuring that the steam circulates around the dough. This setup creates a warm, moist environment that encourages yeast activity and promotes even rising. The dough is left to proof for the recommended time, which can range from 30 minutes to several hours, depending on the recipe and desired outcome.
During the proofing process, the yeast consumes the sugars in the dough, producing carbon dioxide and alcohol as byproducts. The carbon dioxide becomes trapped in the gluten structure, causing the dough to expand and rise. This process is crucial for developing the texture and flavor of the bread. By proofing in an oven, you can ensure that this process occurs evenly and consistently, resulting in a perfectly risen loaf.
Why Should You Choose Proofing Bread in Oven Over Traditional Methods?
Choosing proofing bread in oven over traditional methods offers several compelling reasons. First and foremost, it provides a more reliable and consistent environment for dough to rise. Traditional methods often rely on ambient kitchen temperatures, which can be unpredictable and vary throughout the day. This can lead to inconsistent results, with some loaves rising too quickly or not enough. By using your oven as a proofing chamber, you eliminate these variables and ensure that your dough rises evenly every time.
Another advantage is the ability to customize the proofing conditions to suit your specific needs. Whether you're baking sourdough, brioche, or a simple white loaf, you can adjust the temperature and humidity levels to achieve the desired results. This level of control is difficult to achieve with traditional methods, where you're limited by the conditions of your kitchen. By proofing in an oven, you can fine-tune the environment to suit the specific requirements of each recipe, resulting in better quality bread.
Furthermore, proofing bread in oven saves time and effort. Instead of searching for a warm spot in your kitchen or waiting for the right conditions, you can set up your oven and let it do the work for you. This method also reduces the risk of over-proofing or under-proofing, which can occur when relying on ambient conditions. As a result, you can achieve better results with less effort, making it an ideal technique for busy bakers who want to streamline their process.
Step-by-Step Guide to Proofing Bread in Oven
Proofing bread in oven is a straightforward process that can be broken down into a few simple steps. Follow this guide to ensure that your dough rises evenly and develops the perfect texture:
- Preheat the Oven: Set your oven to a low temperature, typically between 80°F and 110°F (27°C to 43°C). This range is ideal for yeast activity and ensures that the dough rises evenly.
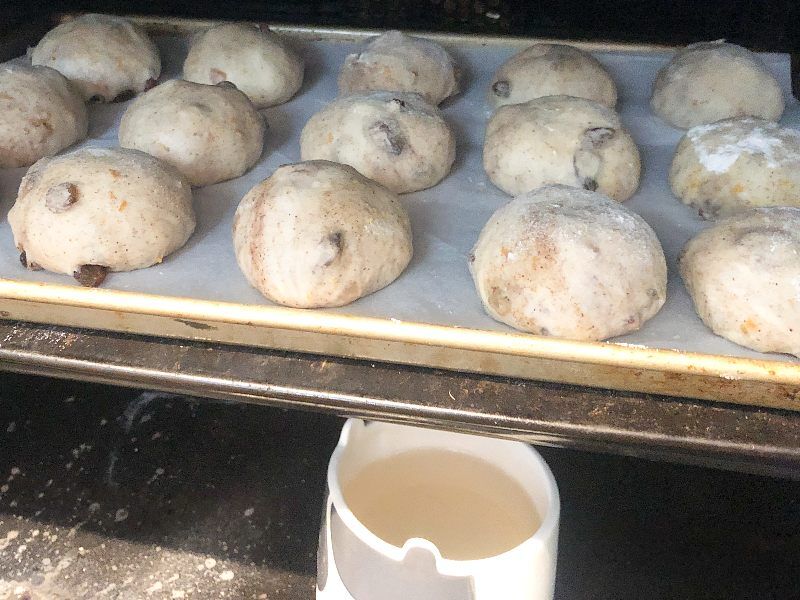
- Add Humidity: Place a shallow bowl of hot water on the bottom rack of the oven. This will create steam and maintain humidity levels, preventing the dough from drying out during the proofing process.
- Position the Dough: Place the dough on the middle rack of the oven, either in a covered container or directly on a baking sheet. Ensure that the bowl of water is positioned below the dough to allow the steam to circulate.
- Proof the Dough: Leave the dough to proof for the recommended time, which can range from 30 minutes to several hours, depending on the recipe and desired outcome. Check the dough periodically to ensure it doesn't over-proof.
- Bake the Bread: Once the dough has risen sufficiently, remove it from the oven and preheat the oven to the recommended baking temperature. Bake the bread according to the recipe instructions.
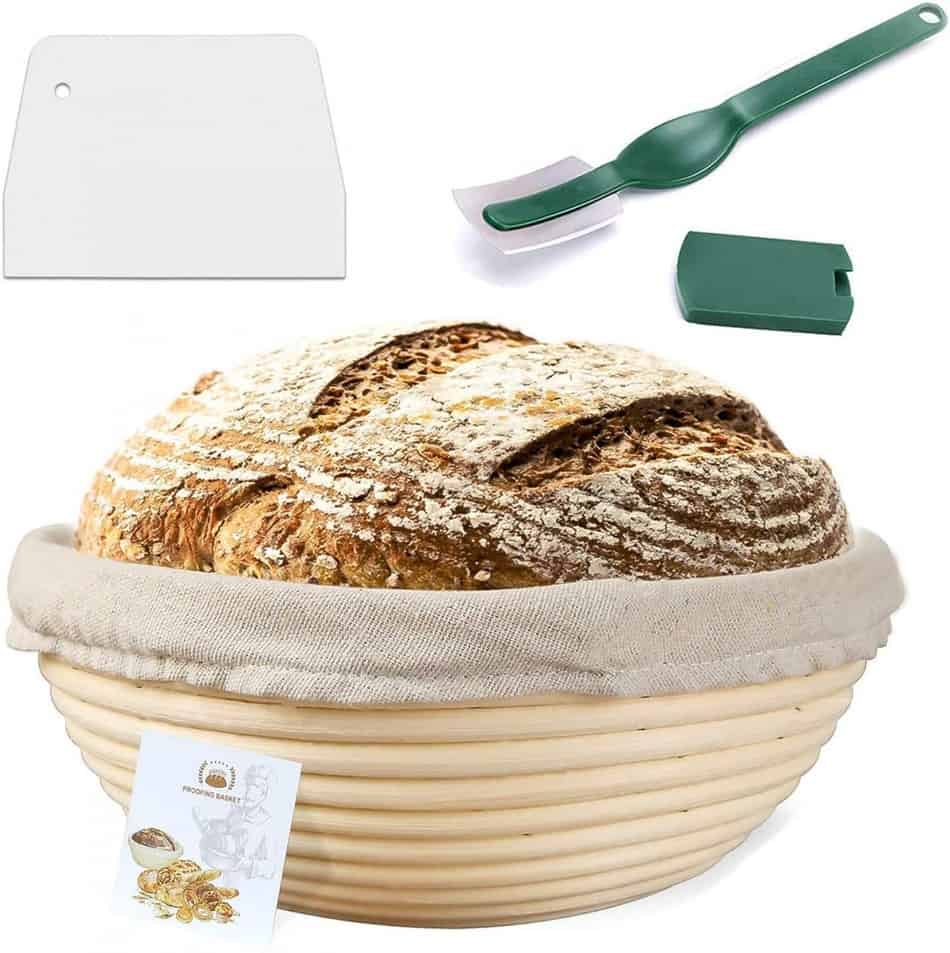
What Equipment Do You Need for Proofing Bread in Oven?
To proof bread in oven, you'll need a few basic pieces of equipment:
- Oven: A standard home oven is sufficient for this technique. Ensure that it has at least two racks to accommodate the bowl of water and the dough.
- Bowl of Water: A shallow, heat-resistant bowl is ideal for creating steam and maintaining humidity levels. Fill it with hot water before placing it in the oven.
- Baking Sheet or Proofing Container: Use a baking sheet or covered container to hold the dough during the proofing process. Ensure that it fits comfortably on the middle rack of the oven.
Tips and Tricks for Perfect Proofing
To achieve the best results when proofing bread in oven, consider the following tips and tricks:
- Monitor Temperature: Use an oven thermometer to ensure that the temperature remains within the recommended range. This will help you avoid over-proofing or under-proofing.
- Adjust Humidity: If the dough seems to be drying out, add more hot water to the bowl or cover it with a damp cloth. Conversely, if the dough is too sticky, reduce the amount of water in the bowl.
- Check Dough Regularly: Periodically check the dough to ensure it's rising evenly. Gently press it with your finger; if it springs back slowly, it's ready to bake.
Common Mistakes to Avoid When Proofing Bread in Oven
When proofing bread in oven, there are a few common mistakes to avoid:
- Setting the Temperature Too High: If the oven is too warm, the yeast can become overactive, leading to over-proofing and a dense loaf. Stick to the recommended temperature range.
- Forgetting to Add Humidity: Without sufficient humidity, the dough can dry out and develop a tough skin, which can hinder rising. Always include a bowl of water to maintain moisture levels.
- Leaving the Dough Too Long: Over-proofing can cause the dough to collapse, resulting in a flat loaf. Check the dough regularly and bake it