Are you tired of paying hefty mechanic fees for a simple CV joint replacement? Or maybe you’re a DIY enthusiast looking to add a new skill to your repertoire. Whatever your reason, learning how to install a CV joint can save you money and give you a sense of accomplishment. A CV (constant velocity) joint is a crucial component of your car’s drivetrain, allowing the wheels to move smoothly while transmitting power from the transmission to the wheels. If ignored, a damaged CV joint can lead to expensive repairs or even catastrophic failure. In this article, we’ll break down the process step by step, ensuring you have all the tools and knowledge you need to tackle this project with confidence.
Installing a CV joint may seem intimidating at first, but with the right approach and guidance, it’s a task that most people can handle with minimal assistance. This guide will cover everything from understanding the basics of CV joints to troubleshooting common issues. Whether you’re a seasoned mechanic or a beginner, we’ll walk you through each stage of the process, offering tips, tricks, and warnings to help you avoid common pitfalls. By the end of this article, you’ll be equipped with the confidence and expertise to perform this repair on your own.
Optimizing your vehicle's performance doesn’t have to mean shelling out big bucks at the repair shop. With a bit of patience and the right tools, you can learn how to install a CV joint and keep your car running smoothly for years to come. So, let’s dive in and explore this essential automotive skill in detail!
Read also:Discover The Magic Of Medieval Times San Antonio A Journey Through History And Adventure
Table of Contents
- 1. Understanding the Basics of CV Joints
- 2. What Tools Do You Need for Installing a CV Joint?
- 3. How to Diagnose a Faulty CV Joint?
- 4. Step-by-Step Guide: How to Install CV Joint
- 5. Why Is It Important to Replace the CV Joint Boots?
- 6. Common Mistakes to Avoid When Installing CV Joints
- 7. How Long Does It Take to Install a CV Joint?
- 8. Is It Worth It to Learn How to Install CV Joint Yourself?
- 9. Frequently Asked Questions
- 10. Conclusion
Understanding the Basics of CV Joints
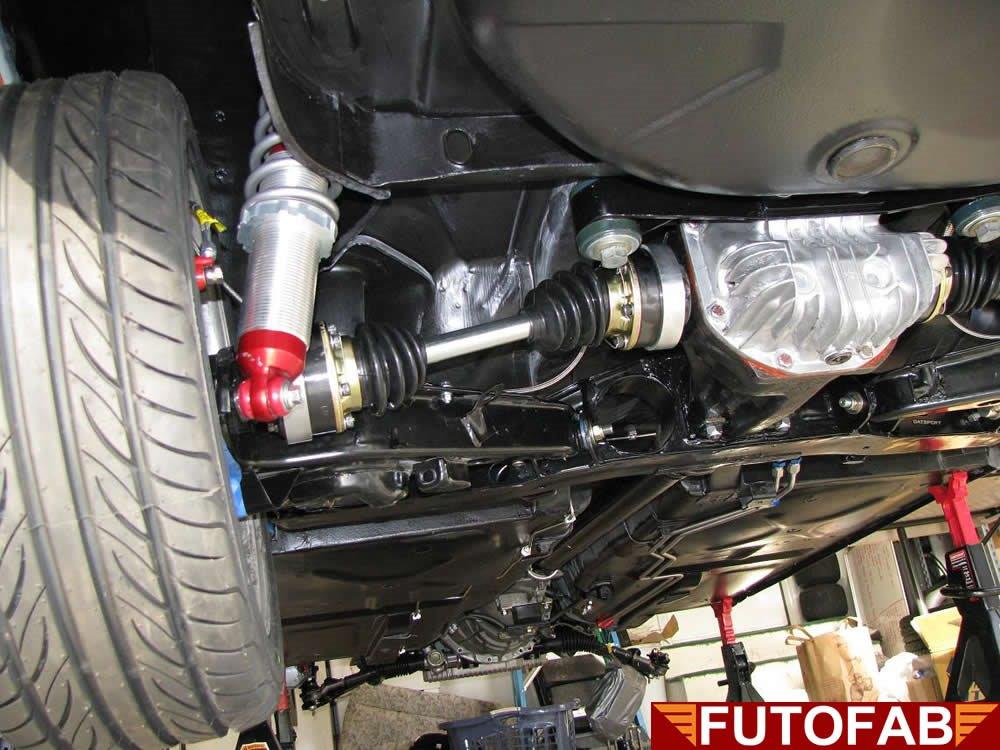
A CV joint, or constant velocity joint, plays a critical role in your vehicle's drivetrain system. It allows the front wheels to turn and move up and down with the suspension while maintaining a constant speed and power transfer from the transmission to the wheels. Without CV joints, your car would struggle to handle turns and uneven terrain effectively.
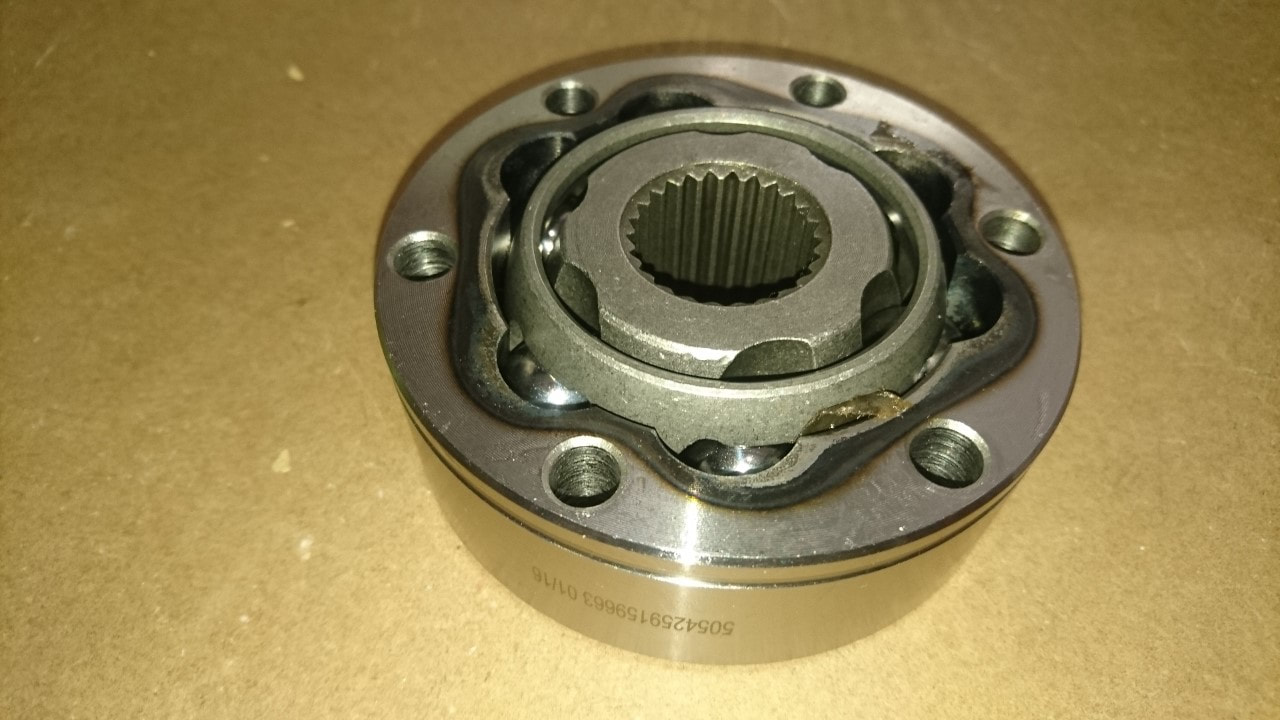
CV joints come in two main types: inner and outer. The inner CV joint connects the transmission to the driveshaft, while the outer CV joint connects the driveshaft to the wheel hub. Both types are encased in rubber or plastic boots that protect the joint from dirt, debris, and moisture. Over time, these boots can crack or tear, leading to grease leakage and eventual joint failure.
Before diving into the installation process, it’s essential to understand the function and importance of CV joints. This knowledge will not only help you identify problems early but also ensure you perform the repair correctly. For instance, knowing the difference between an inner and outer CV joint can save you time and effort when sourcing replacement parts.
What Are the Symptoms of a Failing CV Joint?
Identifying a failing CV joint early can prevent further damage to your vehicle. Some common signs include clicking noises when turning, vibrations during acceleration, and grease leaks around the wheels. If you notice any of these symptoms, it’s crucial to address the issue promptly to avoid more costly repairs.
Additionally, inspecting the CV joint boots regularly can help you catch problems before they escalate. A torn or cracked boot is often the first indicator of potential joint failure. By replacing the boot or the entire joint at the first sign of trouble, you can extend the life of your vehicle’s drivetrain.
Why Do CV Joints Fail?
CV joints typically fail due to wear and tear, lack of lubrication, or damage to the protective boots. Over time, the constant motion and stress placed on the joints can cause them to degrade. Exposure to dirt, water, and road salt can accelerate this process, making regular maintenance essential.
Read also:How To Craft The Perfect Felicitaciones De Graduacioacuten De Universidad A Comprehensive Guide
To prolong the life of your CV joints, ensure they remain well-lubricated and protected by intact boots. Avoid driving on rough roads unnecessarily and have your vehicle inspected regularly for signs of wear. With proper care, your CV joints can last the lifetime of your vehicle.
What Tools Do You Need for Installing a CV Joint?
Before starting the installation process, it’s crucial to gather the necessary tools and materials. Having the right equipment on hand will make the job smoother and more efficient. Below is a list of essential tools you’ll need to complete the task:
- Socket set (metric and standard)
- Torque wrench
- Jack and jack stands
- Hammer and chisel
- Pry bar
- Impact wrench (optional)
- New CV joint and boots
- Gasket sealant
While some of these tools may seem basic, they play a vital role in ensuring the installation goes smoothly. For example, using a torque wrench ensures that bolts are tightened to the manufacturer’s specifications, preventing overtightening or under-tightening that could lead to future problems.
Additionally, investing in high-quality tools can make a significant difference in the ease and accuracy of the installation. For instance, an impact wrench can save you time when loosening stubborn bolts, while a sturdy pry bar helps separate components without causing damage.
How to Diagnose a Faulty CV Joint?
Diagnosing a faulty CV joint involves a combination of visual inspection and test driving. Start by visually examining the CV joint boots for signs of damage, such as cracks, tears, or grease leaks. If you notice any of these issues, it’s likely the joint is compromised and needs replacement.
Next, take your vehicle for a test drive, paying close attention to any unusual noises or vibrations. Clicking sounds when turning, especially at low speeds, are a classic sign of a failing outer CV joint. Vibrations during acceleration may indicate an issue with the inner CV joint. Document these symptoms to help you pinpoint the exact problem.
Finally, consult your vehicle’s service manual for specific diagnostic procedures. Many manuals provide detailed instructions on how to identify and address CV joint issues, ensuring you address the root cause rather than just the symptoms.
Step-by-Step Guide: How to Install CV Joint
Now that you’ve gathered your tools and diagnosed the problem, it’s time to dive into the installation process. Follow these steps carefully to ensure a successful repair:
- Lift and secure the vehicle: Use a jack and jack stands to lift the car and secure it safely. Always double-check that the vehicle is stable before proceeding.
- Remove the wheel: Loosen the lug nuts and remove the wheel to access the CV joint.
- Disconnect the sway bar and brake caliper: These components can interfere with the installation process, so it’s best to remove them temporarily.
- Remove the axle: Using a socket set, loosen and remove the bolts securing the axle to the wheel hub. Gently tap the axle with a hammer to break it free if necessary.
- Install the new CV joint: Carefully slide the new CV joint onto the driveshaft, ensuring it aligns properly. Secure it with the provided bolts and torque them to the manufacturer’s specifications.
- Reassemble the components: Reattach the sway bar, brake caliper, and wheel, ensuring everything is tightened securely.
- Test the repair: Lower the vehicle and take it for a test drive to ensure the new CV joint is functioning correctly.
Remember to work methodically and take your time. Rushing the process can lead to mistakes, which may cause further damage or safety issues.
Why Is It Important to Replace the CV Joint Boots?
The CV joint boots serve as the first line of defense against dirt, debris, and moisture, ensuring the joint remains clean and well-lubricated. Over time, these boots can deteriorate, allowing contaminants to enter and damage the joint. Replacing worn or damaged boots is a cost-effective way to extend the life of your CV joints.
When installing a new CV joint, it’s always a good idea to replace the boots as well, even if they appear to be in good condition. This preventive measure can save you from future headaches and expensive repairs. Additionally, modern CV joint kits often include new boots, making the replacement process convenient and straightforward.
What Are the Benefits of Using High-Quality CV Joint Boots?
Investing in high-quality CV joint boots can make a significant difference in the longevity and performance of your CV joints. Premium boots are typically made from durable materials that resist cracking, tearing, and degradation from road salt and chemicals. They also provide a better seal, reducing the risk of grease leakage and contamination.
When selecting replacement boots, look for products from reputable manufacturers with positive customer reviews. While they may cost slightly more upfront, the peace of mind and extended lifespan they offer are well worth the investment.
Common Mistakes to Avoid When Installing CV Joints
Even experienced mechanics can make mistakes when installing CV joints. Here are some common errors to watch out for and how to avoid them:
- Over-tightening bolts: Using excessive force when tightening bolts can strip threads or damage components. Always follow the manufacturer’s torque specifications.
- Forgetting to replace the boots: Neglecting to install new boots can lead to premature joint failure. Always replace the boots when installing a new CV joint.
- Not using gasket sealant: Failing to apply gasket sealant can result in leaks and contamination. Use the recommended sealant to ensure a proper seal.
- Improper alignment: Misaligning the CV joint during installation can cause uneven wear and early failure. Double-check the alignment before securing the bolts.
By being aware of these potential pitfalls, you can avoid costly mistakes and ensure a successful installation.
How Long Does It Take to Install a CV Joint?
The time required to install a CV joint varies depending on your experience level and the complexity of the repair. On average, a seasoned mechanic can complete the job in 2-4 hours, while a beginner may take 4-6 hours or more. Factors such as the availability of tools, the condition of surrounding components, and the specific vehicle model can all impact the timeline.
To speed up the process, familiarize yourself with the steps beforehand and have all necessary tools and materials on hand. Taking your time and working methodically will also help you avoid mistakes that could add to the overall duration.
Is It Worth It to Learn How to Install CV Joint Yourself?
Learning how to install a CV joint can be a rewarding and cost-effective skill. While the initial investment in tools and materials may seem high, the long-term savings on labor costs can make it worthwhile. Additionally, knowing how to perform this repair can give you a sense of accomplishment and independence.
However, it’s important to weigh the pros and cons before attempting the repair yourself. If you’re inexperienced or uncomfortable working on your vehicle, it may be best to leave the job to a professional. On the other hand, if you’re eager to learn and have the necessary resources, tackling this project can be a valuable learning experience.
Frequently Asked Questions
1. Can I Drive With a Damaged CV Joint?
Driving with a damaged CV joint is not recommended, as it can lead to further damage and potentially dangerous situations. If you suspect a problem, have the vehicle inspected and repaired as soon as possible.
2. How Much Does It Cost to Replace a CV Joint?
The cost of replacing a CV joint varies depending on the vehicle model and labor rates. On average, you can expect to pay between $300 and $700 for parts and labor. DIY repairs can significantly reduce these costs.
3. Do I Need Special Tools to Install a CV Joint?
While some specialized tools can