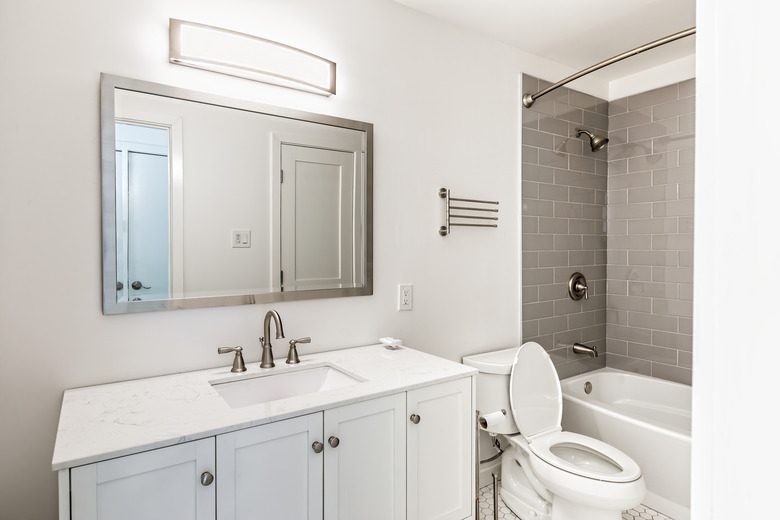
Imagine stepping into your bathroom after a long day, only to find water leaking from the edges of your bathtub or mold creeping into the corners. It’s a nightmare waiting to happen! One of the simplest yet most effective ways to prevent such issues is by learning how do you caulk around a bathtub. Proper caulking not only seals gaps but also enhances the aesthetic appeal of your bathroom. Whether you're a seasoned DIY enthusiast or a complete beginner, understanding the right techniques and tools can save you time, money, and frustration. This guide dives deep into the art of caulking, offering step-by-step instructions, expert tips, and common pitfalls to avoid.
Caulking around a bathtub might seem like a straightforward task, but it requires precision, patience, and the right materials. Many homeowners underestimate the importance of maintaining a watertight seal, leading to costly repairs down the road. From selecting the appropriate caulk to preparing the surface and applying it like a pro, this article breaks down every aspect of the process. By the end, you’ll have the confidence to tackle your caulking project with ease and achieve professional-looking results.
Before we dive into the nitty-gritty of how do you caulk around a bathtub, it’s crucial to understand why caulking is essential. A well-sealed bathtub prevents water damage, reduces mold growth, and prolongs the lifespan of your bathroom fixtures. With the right guidance and tools, even beginners can master this skill. So, whether you’re recaulking an old bathtub or installing a new one, this guide will be your ultimate companion. Let’s get started!
Read also:Discover The Ultimate Toy The Big Barbie Doll House For Every Childs Imagination
Table of Contents
- 1. Why Is Caulking Around a Bathtub Important?
- 2. What Tools and Materials Do You Need?
- 3. How Do You Prepare the Surface Before Caulking?
- 4. What Are the Best Caulking Techniques?
- 5. How Do You Caulk Around a Bathtub Step by Step?
- 6. Common Mistakes to Avoid
- 7. Troubleshooting Caulking Issues
- 8. FAQs About Caulking Around a Bathtub
Why Is Caulking Around a Bathtub Important?
Have you ever wondered why caulking is such a critical step in maintaining your bathtub? At first glance, it might seem like a minor detail, but the reality is far from it. Caulking serves as a protective barrier between your bathtub and the surrounding surfaces, ensuring that water doesn’t seep into the gaps and cause damage. Over time, water infiltration can lead to rot, mold, mildew, and even structural issues, especially if left unchecked. Proper caulking helps prevent these problems while also enhancing the overall appearance of your bathroom.
In addition to its functional benefits, caulking plays a significant role in extending the lifespan of your bathtub and surrounding materials. By creating a watertight seal, it minimizes wear and tear caused by moisture exposure. Moreover, a well-caulked bathtub adds a polished, finished look to your bathroom, making it more visually appealing. Whether you’re preparing your home for sale or simply want to maintain its value, investing time in proper caulking is a smart move. So, why risk damage and aesthetic flaws when a simple solution is within reach?
Let’s explore some specific scenarios where caulking makes a difference. For instance, if you’ve recently installed a new bathtub or replaced an old one, caulking ensures that the edges are securely sealed against the wall. Similarly, if you notice gaps or cracks in the existing caulk, recaulking becomes necessary to restore the seal. Understanding the importance of caulking sets the foundation for learning how do you caulk around a bathtub effectively.
What Tools and Materials Do You Need?
Before diving into the caulking process, it’s essential to gather the right tools and materials. Having everything on hand will make the job smoother and more efficient. Start by selecting the appropriate type of caulk for your project. Silicone caulk is a popular choice due to its flexibility, durability, and resistance to moisture. However, if you prefer a paintable option, acrylic latex caulk might be a better fit. Both options have their pros and cons, so consider the specific needs of your bathtub and bathroom environment.
In addition to caulk, you’ll need a few basic tools to ensure a successful application. A caulk gun is indispensable for controlling the flow of caulk and achieving precise lines. A utility knife or scraper is necessary for removing old caulk, while a caulking tool or wet finger can help smooth the caulk once applied. Don’t forget to have cleaning supplies like rubbing alcohol, isopropyl alcohol, or acetone on hand to clean up any mistakes or excess caulk. Lastly, masking tape can be used to create clean edges and prevent smudging.
Here’s a quick checklist of tools and materials you’ll need:
Read also:Why A Ski Town Chicken Joint Could Be The Perfect Pit Stop For Adventure Seekers
- Silicone or acrylic latex caulk
- Caulk gun
- Utility knife or scraper
- Caulking tool or wet finger
- Cleaning supplies (rubbing alcohol, isopropyl alcohol, or acetone)
- Masking tape
How Do You Prepare the Surface Before Caulking?
Preparation is key to achieving a successful caulking job. Before you apply new caulk, it’s crucial to remove the old caulk thoroughly. Old caulk can harbor mold, mildew, and dirt, which can compromise the adhesion of the new caulk. Start by using a utility knife or scraper to peel away the old caulk. Be gentle to avoid damaging the surrounding surfaces. Once the old caulk is removed, clean the area with a mixture of water and vinegar or a mild detergent to eliminate any residue.
After cleaning, let the surface dry completely. Moisture can interfere with the bonding process, so it’s essential to ensure the area is dry before proceeding. You can speed up the drying process by using a fan or hairdryer. Once the surface is clean and dry, you’re ready to move on to the next step. Proper preparation not only ensures a stronger bond but also helps prevent future issues like mold growth or peeling caulk.
What Are the Best Caulking Techniques?
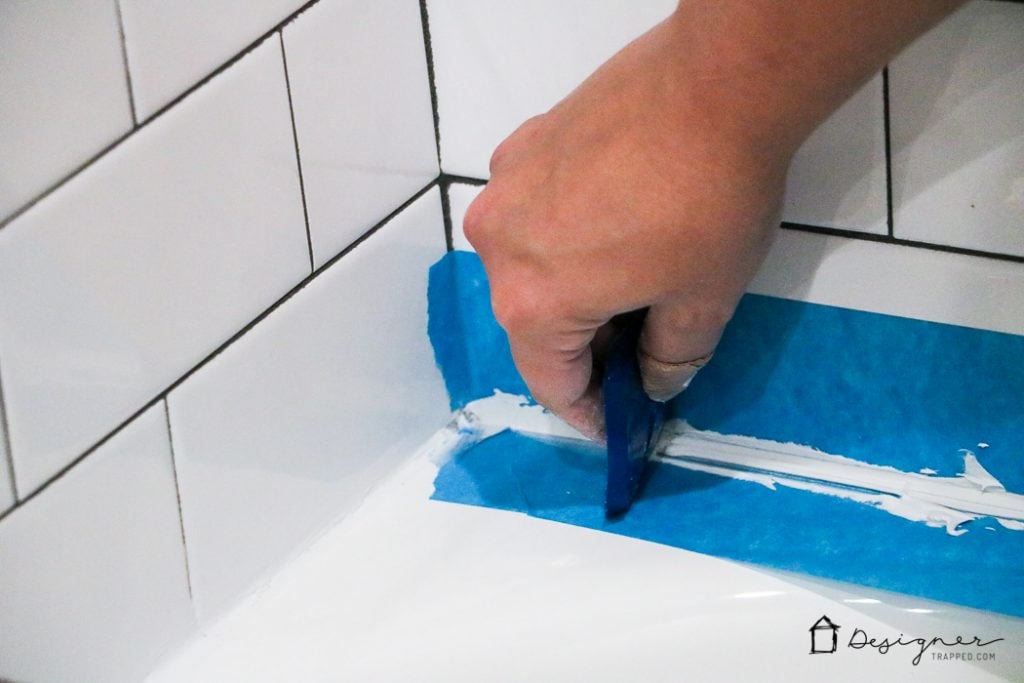
Applying caulk might seem straightforward, but mastering the right techniques can make a world of difference. Begin by loading the caulk tube into the caulk gun and cutting the tip at a 45-degree angle. This angle allows for better control and precision when applying the caulk. Start at one end of the seam and apply steady pressure to the trigger as you move along the gap. Aim to maintain a consistent speed and pressure to achieve an even bead of caulk.
Once the caulk is applied, use a caulking tool or wet finger to smooth it out. This step is crucial for creating a professional finish and ensuring the caulk adheres properly. Wipe away any excess caulk with a clean cloth or paper towel. If you’re using masking tape, remove it immediately after smoothing the caulk to reveal clean edges. Remember, practice makes perfect, so don’t be discouraged if your first attempt isn’t flawless.
How Do You Caulk Around a Bathtub Step by Step?
Now that you have the tools, materials, and techniques down, let’s walk through the step-by-step process of how do you caulk around a bathtub. Begin by preparing the surface as described earlier. Once the area is clean and dry, apply a bead of caulk along the seam where the bathtub meets the wall. Use steady, even strokes to ensure complete coverage. After applying the caulk, smooth it out with a caulking tool or wet finger for a polished finish. Allow the caulk to dry according to the manufacturer’s instructions, typically 24 hours, before exposing it to water.
Common Mistakes to Avoid
Even with the best intentions, mistakes can happen during the caulking process. One common error is applying too much or too little caulk. Too much caulk can lead to uneven lines and excess material, while too little may result in gaps and poor adhesion. Another frequent mistake is failing to clean the surface properly, which can cause the caulk to peel or crack prematurely. Additionally, neglecting to smooth the caulk can leave unsightly ridges and imperfections.
To avoid these pitfalls, take your time and focus on each step. Don’t rush the preparation phase, and double-check that the surface is clean and dry before applying the caulk. Use masking tape to create clean edges and remove it promptly after smoothing the caulk. By paying attention to detail and following the recommended techniques, you can achieve professional results every time.
Troubleshooting Caulking Issues
Despite your best efforts, you might encounter some issues during or after the caulking process. For instance, if the caulk doesn’t adhere properly, it could be due to insufficient cleaning or moisture on the surface. In such cases, re-clean the area and allow it to dry completely before reapplying the caulk. Another common problem is bubbles forming in the caulk, which can occur if the caulk gun is applied too forcefully. To prevent this, use gentle, steady pressure and avoid overfilling the gap.
If you notice cracks or peeling after the caulk has dried, it might indicate that the wrong type of caulk was used or that the surface wasn’t prepared adequately. In these situations, remove the faulty caulk and start again with the appropriate materials and techniques. Remember, troubleshooting is part of the learning process, and each challenge presents an opportunity to improve your skills.
FAQs About Caulking Around a Bathtub
How Long Does Caulk Take to Dry?
The drying time for caulk depends on the type of caulk and environmental conditions. Silicone caulk typically takes 24 hours to dry, while acrylic latex caulk may dry faster, often within 6-12 hours. Always refer to the manufacturer’s instructions for specific drying times and recommendations.
Can You Paint Over Caulk?
Yes, you can paint over caulk, but only if you use a paintable caulk like acrylic latex. Silicone caulk is not paintable, so it’s important to choose the right type of caulk for your project. If you plan to paint the caulk, ensure it’s fully cured before applying paint for the best results.
How Often Should You Recaulk a Bathtub?
The frequency of recaulking depends on factors like usage, environmental conditions, and the quality of the caulk. On average, you should recaulk your bathtub every 5-10 years. However, if you notice cracks, peeling, or mold growth, it’s best to recaulk sooner to prevent damage.
Conclusion
Learning how do you caulk around a bathtub is a valuable skill that every homeowner should master. By following the steps outlined in this guide, you can achieve professional results and protect your bathtub from water damage, mold, and other issues. Remember to prepare the surface thoroughly, use the right tools and materials, and practice patience and precision during the application process. With practice and experience, you’ll become a caulking pro in no time!