Are you ready to elevate your nail game with nail wraps? Nail wraps have become a popular choice for those seeking a quick, affordable, and stylish way to enhance their nails. If you're wondering how do you put on nail wraps, you're in the right place! This guide will walk you through every step of the process, ensuring you achieve professional-looking results at home. Nail wraps are not only easy to apply but also offer a variety of designs, colors, and textures that cater to every style preference. Whether you're a beginner or a seasoned DIY enthusiast, this article will provide you with all the information you need to master the art of nail wraps.
Nail wraps have gained immense popularity due to their convenience and versatility. Unlike traditional nail polish, nail wraps offer a no-mess, no-drip application process that can last for weeks. They are perfect for anyone who wants to avoid the hassle of frequent touch-ups or trips to the salon. But how do you put on nail wraps without making mistakes? This question is one that many first-timers ask, and the answer lies in understanding the tools, techniques, and tips that make the application process seamless. In this article, we’ll delve into the specifics, ensuring you’re equipped with all the knowledge you need to achieve flawless results.
As we explore the world of nail wraps, we’ll also address common concerns such as durability, maintenance, and removal. Whether you're looking for step-by-step instructions, troubleshooting tips, or advice on selecting the best designs, this guide has got you covered. So, let’s dive in and discover how you can transform your nails with confidence and style. By the end of this article, you’ll be a pro at applying nail wraps and ready to experiment with endless possibilities.
Read also:Discover The Magic Of Medieval Times San Antonio A Journey Through History And Adventure
Table of Contents
- 1. What Are Nail Wraps and Why Are They Popular?
- 2. How Do You Put on Nail Wraps? Step-by-Step Guide
- 3. Choosing the Right Nail Wraps for Your Style
- 4. Tools and Materials You’ll Need
- 5. Common Mistakes to Avoid When Applying Nail Wraps
- 6. How Long Do Nail Wraps Last, and How Do You Maintain Them?
- 7. Can You Remove Nail Wraps Safely at Home?
- 8. Frequently Asked Questions About Nail Wraps
What Are Nail Wraps and Why Are They Popular?
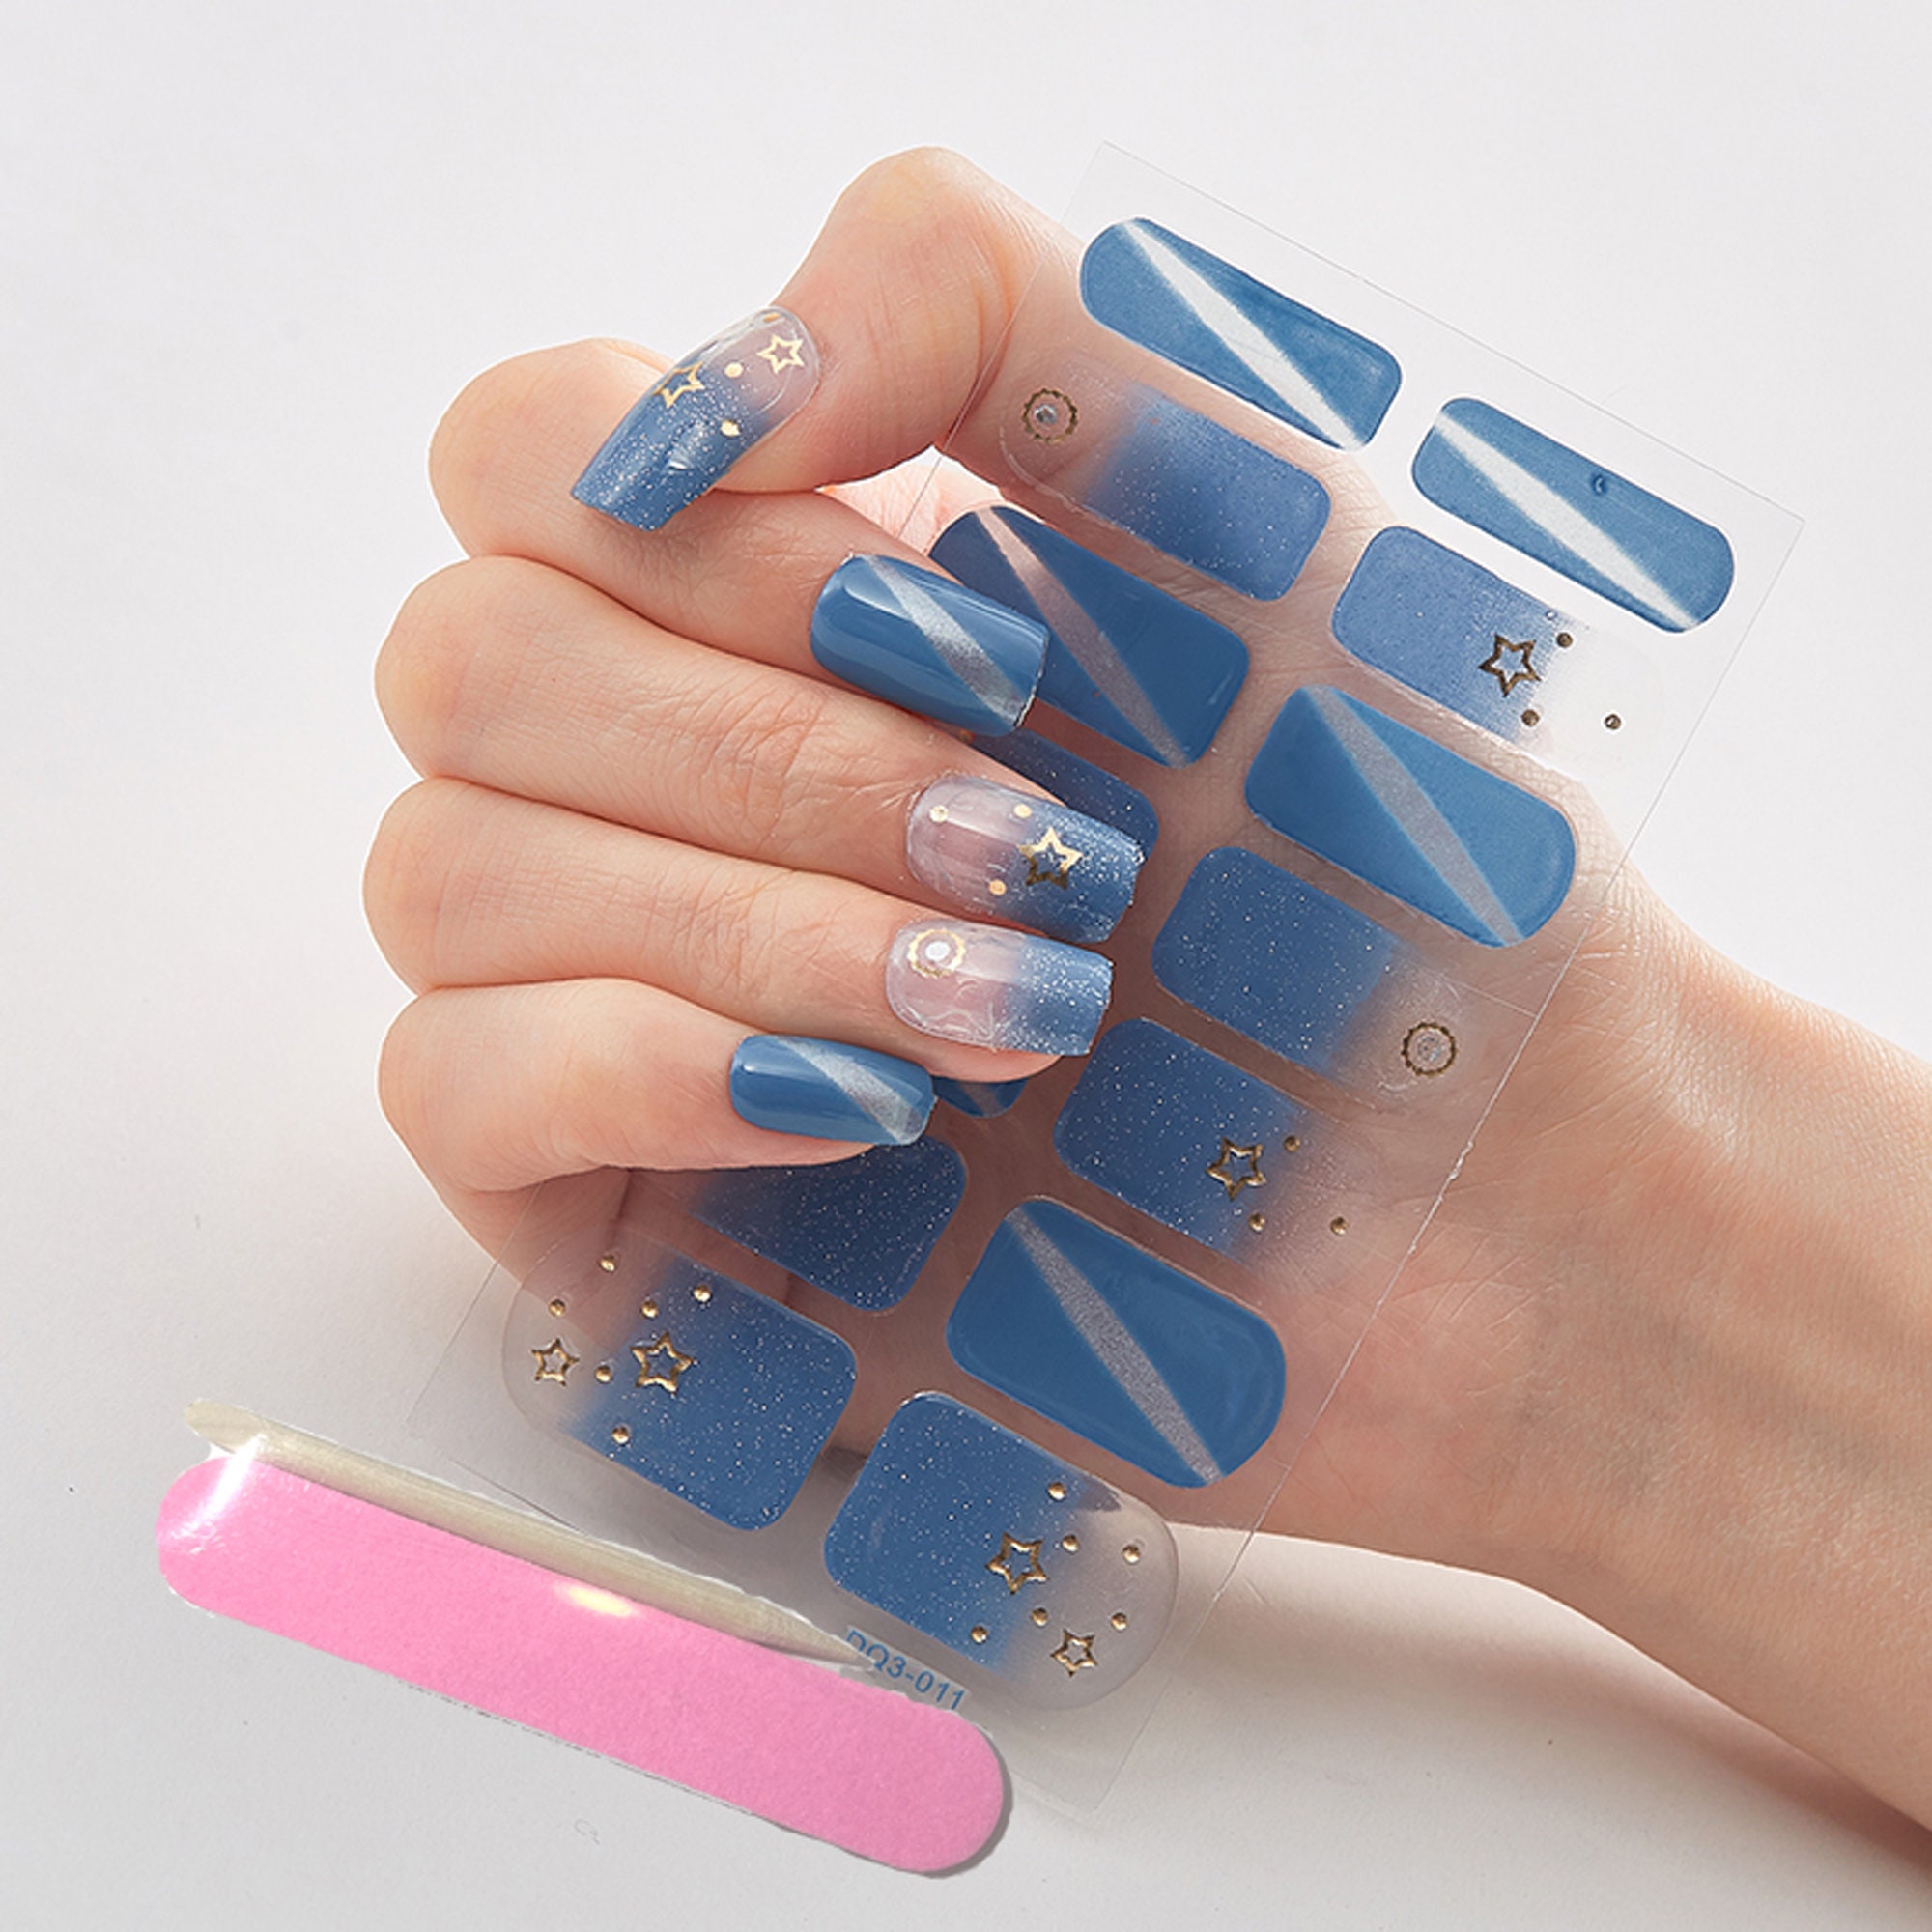
Nail wraps, also known as nail transfers, are thin, pre-designed vinyl sheets that adhere to your natural nails or enhancements. These wraps are printed with intricate patterns, vibrant colors, and unique textures, offering endless customization options. They have become a go-to choice for nail enthusiasts because of their ease of application, affordability, and durability. Unlike traditional nail polish, which requires precision and patience, nail wraps provide a hassle-free way to achieve salon-quality nails in minutes.
One of the reasons nail wraps are so popular is their versatility. Whether you're attending a formal event, going on vacation, or simply wanting to spruce up your everyday look, there's a nail wrap design for every occasion. From classic French tips to bold geometric patterns, nail wraps cater to all tastes. Additionally, they are perfect for beginners who may struggle with painting their nails evenly or maintaining a consistent design. With nail wraps, you can achieve professional results without the need for advanced skills or expensive equipment.
Another advantage of nail wraps is their durability. Once applied correctly, they can last for two to three weeks without chipping or peeling. This makes them an ideal choice for those with active lifestyles or those who want to save time and money on frequent nail appointments. Plus, they are easy to remove, allowing you to switch up your look as often as you like. Overall, nail wraps offer a convenient, stylish, and long-lasting solution for anyone looking to enhance their nails.
How Do You Put on Nail Wraps? Step-by-Step Guide
Now that you know what nail wraps are and why they’re so popular, let’s dive into the process of how do you put on nail wraps. The application process is straightforward and can be mastered with a little practice. Here’s a step-by-step guide to help you achieve flawless results:
- Prepare Your Nails: Start by cleaning your nails thoroughly with nail polish remover to ensure there’s no residue or oil on the surface. Trim and file your nails to your desired shape and length. This step is crucial for ensuring the wraps adhere properly.
- Select the Right Size: Nail wraps come in different sizes to accommodate various nail lengths. Choose the wrap that best fits your nail size. If the wrap is too large, you can trim it slightly with scissors for a better fit.
- Apply the Wrap: Gently peel the wrap from the backing and position it over your nail. Use your fingers or a small tool to press the wrap onto your nail, starting from the cuticle and working your way to the tip. Ensure the wrap is smooth and free of air bubbles.
- Trim the Excess: Once the wrap is in place, use a pair of nail scissors or a nail file to trim any excess material around the edges. Be careful not to cut into your nail.
- Seal the Edges: To ensure the wrap stays in place, seal the edges with a clear topcoat. This will also add shine and protect the design from wear and tear.
By following these steps, you can confidently apply nail wraps at home. With a little practice, you’ll be able to achieve professional-looking results every time.
Choosing the Right Nail Wraps for Your Style
With so many nail wrap designs available, selecting the right ones for your style can be overwhelming. However, by considering a few factors, you can narrow down your choices and find the perfect wraps for your needs. First, think about the occasion for which you’ll be wearing the wraps. Are you attending a formal event, or are you looking for a casual everyday look? This will help you decide on the level of intricacy and color intensity you want.
Read also:Unveiling The Magic The Tony Awards Color Purple Redefines Broadway Excellence
Next, consider your personal preferences. Do you lean toward classic, understated designs or bold, eye-catching patterns? Many nail wrap brands offer collections inspired by different themes, such as seasonal trends, cultural influences, or pop culture icons. Additionally, think about the texture you want. Some wraps have a matte finish, while others have a glossy or metallic sheen. Experimenting with different textures can add depth and dimension to your nails.
Finally, don’t forget to consider your nail shape and length. Certain designs may look better on longer nails, while others may suit shorter, more rounded nails. By taking these factors into account, you can choose nail wraps that complement your style and enhance your overall look.
Tools and Materials You’ll Need
Before you begin applying nail wraps, it’s essential to gather all the necessary tools and materials. Having everything ready beforehand will make the process smoother and more efficient. Here’s a list of what you’ll need:
- Nail wraps of your choice
- Nail polish remover
- Nail file or buffer
- Small scissors or nail clippers
- Clear topcoat
- Small applicator tool (optional)
Having these tools on hand will ensure you’re prepared for every step of the application process. Remember, quality tools can make a significant difference in the final result, so invest in reliable products if possible.
What Are the Common Mistakes to Avoid When Applying Nail Wraps?
While applying nail wraps is relatively easy, there are a few common mistakes that beginners often make. Avoiding these pitfalls can help you achieve better results and prevent frustration. One common mistake is not preparing your nails properly. Failing to clean and file your nails before applying the wraps can lead to poor adhesion and premature peeling. Always ensure your nails are clean and smooth before proceeding.
Another mistake is choosing wraps that are too large for your nails. While it’s easy to trim the wraps to fit, starting with a wrap that’s too small can make the application process more challenging. Take the time to select the right size for each nail, and don’t hesitate to trim the wraps slightly if needed. Additionally, applying too much pressure when sealing the edges can cause the wrap to tear or shift. Use a gentle touch and work slowly to avoid damaging the wrap.
Finally, neglecting to apply a clear topcoat is a common oversight. Without proper sealing, the wraps may not last as long and could become prone to chipping. Always finish the process by applying a high-quality topcoat to ensure longevity and shine.
How Long Do Nail Wraps Last, and How Do You Maintain Them?
When applied correctly, nail wraps can last anywhere from two to three weeks. Their durability depends on factors such as the quality of the wraps, the application process, and how well you maintain them. To ensure your nail wraps stay intact and looking great, follow these maintenance tips:
- Avoid exposing your nails to excessive moisture, as water can weaken the adhesive and cause the wraps to peel.
- Use gloves when washing dishes or doing household chores to protect your nails from harsh chemicals.
- Reapply a clear topcoat every few days to reinforce the seal and add extra shine.
- Be mindful of activities that could cause physical damage to your nails, such as typing or carrying heavy objects.
By following these simple tips, you can extend the life of your nail wraps and maintain their appearance for weeks.
Can You Remove Nail Wraps Safely at Home?
Yes, you can safely remove nail wraps at home without damaging your natural nails. The process is simple and requires only a few basic tools. Start by soaking a cotton pad in nail polish remover containing acetone. Gently place the soaked pad on each nail and wrap it with aluminum foil. Let it sit for about 10-15 minutes, allowing the remover to dissolve the adhesive. Then, use a gentle nail file to buff away any remaining residue. Avoid using harsh tools or excessive force, as this can harm your nails.
After removing the wraps, it’s important to moisturize your nails and cuticles to restore hydration and prevent dryness. Applying a nourishing cuticle oil can help keep your nails healthy and strong, ensuring they’re ready for your next application.
Frequently Asked Questions About Nail Wraps
Are Nail Wraps Better Than Gel Polish?
Both nail wraps and gel polish have their advantages and disadvantages. Nail wraps are easier and faster to apply, while gel polish requires a UV lamp for curing. Gel polish tends to last longer, but nail wraps offer more design options. Ultimately, the choice depends on your personal preferences and needs.
Can Nail Wraps Damage Your Nails?
When applied and removed correctly, nail wraps should not damage your natural nails. However, using harsh chemicals or excessive force during removal can weaken the nail bed. Always follow proper removal techniques to ensure your nails remain healthy.
Where Can I Buy High-Quality Nail Wraps?
High-quality nail wraps can be purchased from reputable beauty supply stores, both online and offline. Brands such as Nails Inc., PressOn Nails, and Sally Hansen offer a wide range of designs and styles to suit every taste. Always check customer reviews and ratings to ensure you’re getting a reliable product.
Conclusion
In conclusion, mastering the art of how do you put on nail wraps is a skill that can elevate your nail care routine and save you time and money. By following the steps outlined in this guide and avoiding common mistakes, you can achieve professional-looking results at home. Whether you’re a beginner or an experienced DIY enthusiast, nail wraps offer endless possibilities for creativity and self-expression. So, go ahead and explore the world of nail wraps, and let your imagination run wild!