Dealing with a leaking kitchen sink drain can be frustrating, but it doesn’t have to be overwhelming. Whether you’re a DIY enthusiast or a homeowner looking to save on plumbing costs, resealing your kitchen sink drain is a task that can be accomplished with the right tools and techniques. Google Discover users often search for practical solutions to common household issues, and resealing a kitchen sink drain is no exception. In this article, we’ll walk you through everything you need to know, from identifying the problem to completing the repair process with confidence. Whether you’re troubleshooting a slow leak or replacing an old gasket, our expert tips will help you get the job done right the first time.
Leaking kitchen sink drains are more than just an inconvenience—they can lead to costly water damage if left unchecked. Over time, worn-out seals, corroded pipes, and improper installations can cause leaks that affect both your wallet and your home’s structural integrity. Fortunately, resealing your kitchen sink drain isn’t as complicated as it might seem. With the right approach, you can prevent further damage and ensure your sink functions smoothly for years to come. This guide will cover everything from diagnosing common problems to selecting the best materials for resealing.
Our goal is to provide you with actionable, step-by-step instructions that are easy to follow and backed by expert advice. Whether you’re a seasoned DIYer or a beginner, we’ve included detailed explanations, helpful tips, and troubleshooting advice to make the process as seamless as possible. By the end of this article, you’ll not only know how to reseal your kitchen sink drain but also understand how to maintain it for long-term performance. Let’s dive in!
Read also:Unveiling The Charm Of The Ozz Hotel Nice France Your Ultimate Guide
Table of Contents
- 1. What Is a Kitchen Sink Drain Leak?
- 2. Why Does My Sink Leak?
- 3. Tools and Materials Needed for Resealing
- 4. Step-by-Step Guide to Reseal Kitchen Sink Drain
- 5. How to Prevent Future Leaks?
- 6. Common Mistakes to Avoid When Resealing
- 7. Is It Better to Hire a Plumber?
- 8. Frequently Asked Questions
- 9. Conclusion
What Is a Kitchen Sink Drain Leak?
A kitchen sink drain leak refers to any water that escapes from the plumbing system beneath your sink, causing drips, puddles, or even more significant water damage. These leaks can occur at various points in the drainage system, including the sink flange, tailpiece, or P-trap. While minor leaks might seem harmless, they can escalate quickly, leading to mold growth, wood rot, and increased water bills. Understanding the nature of these leaks is the first step toward fixing them effectively.
Leaking kitchen sink drains often stem from worn-out gaskets, loose connections, or improper installation. Over time, the constant exposure to water, heat, and pressure can degrade rubber seals and cause metal components to corrode. Identifying the source of the leak is crucial before attempting to reseal your kitchen sink drain. By recognizing the signs early, you can address the issue promptly and avoid more extensive repairs down the road.
Some common indicators of a kitchen sink drain leak include water stains under the sink, a musty smell, or visible moisture around the pipes. If you notice any of these signs, it’s essential to act quickly to prevent further damage. The good news is that resealing your kitchen sink drain is often a straightforward process that requires minimal tools and expertise.
Why Does My Sink Leak?
Several factors contribute to kitchen sink leaks, and understanding them can help you pinpoint the problem more efficiently. Here are some of the most common reasons why your sink might be leaking:
- Worn-Out Gaskets: Rubber or plastic gaskets that seal the connections between pipes can degrade over time, leading to leaks.
- Loose Connections: Vibrations from water flow or improper tightening during installation can cause pipe joints to loosen, creating gaps for water to escape.
- Corrosion: Metal pipes and fittings can corrode due to prolonged exposure to water, especially if they’re made of low-quality materials.
- Improper Installation: If your sink or drain system wasn’t installed correctly, leaks can occur as a result of misaligned components or insufficient sealing.
By addressing these underlying issues, you can ensure a more durable and effective resealing process. Taking the time to identify the root cause of the leak will save you from potential headaches in the future.
How Can I Identify the Source of the Leak?
Locating the exact source of a kitchen sink drain leak is essential for successful repairs. Start by inspecting the visible parts of the plumbing system beneath your sink. Look for signs of water damage, corrosion, or loose fittings. If you’re unsure where the leak is coming from, you can perform a simple test by running water through the sink and observing where it escapes. This method will help you narrow down the problem area and plan your resealing strategy accordingly.
Read also:Rediscover The Power Of Because Of You Loved Me Celine Dion An Indepth Journey
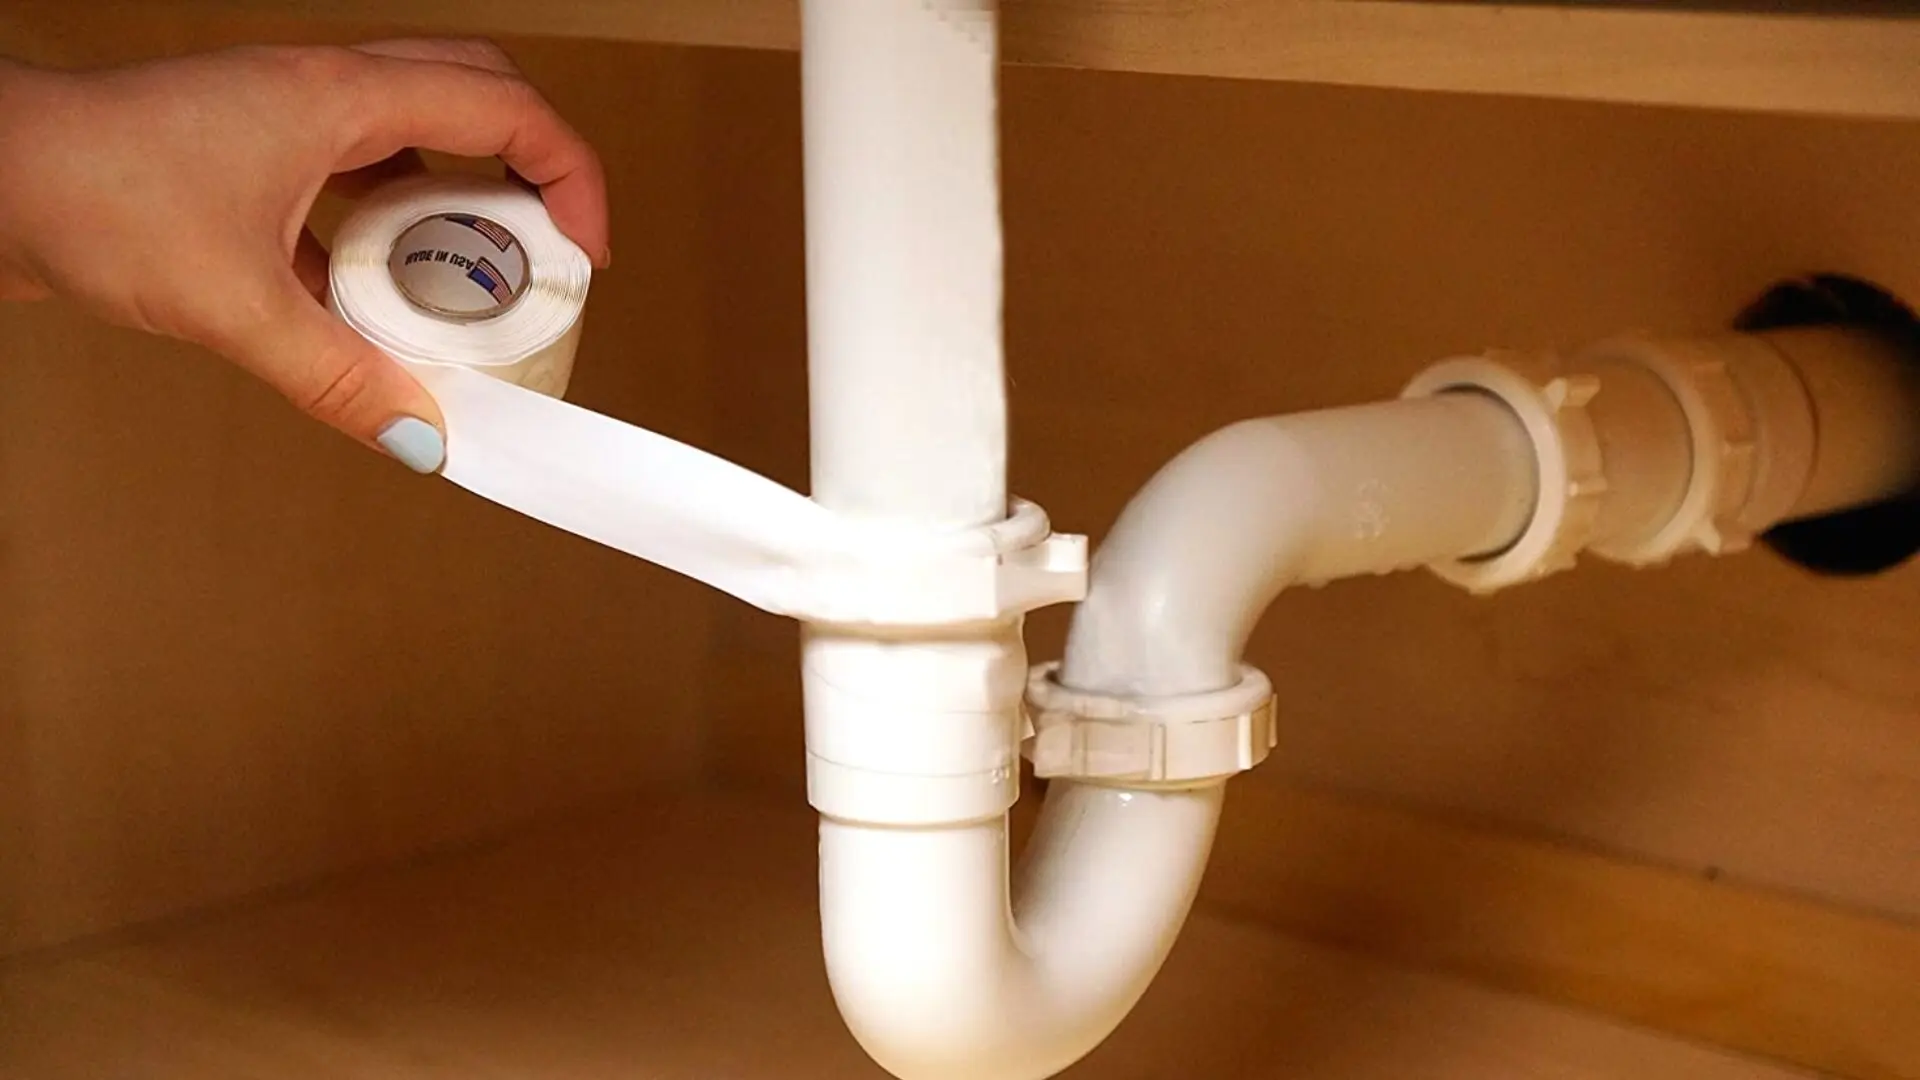
Tools and Materials Needed for Resealing
Before you begin resealing your kitchen sink drain, it’s important to gather all the necessary tools and materials. Having everything on hand will make the process smoother and more efficient. Below is a list of essential items you’ll need:
- Plumber’s Putty: Ideal for creating a watertight seal around the sink flange.
- Teflon Tape: Used to wrap threads on pipe connections for better sealing.
- Gasket Set: Includes replacement gaskets for the sink flange and drain assembly.
- Channel-Lock Pliers: For tightening or loosening nuts and fittings.
- Basin Wrench: Specifically designed for accessing hard-to-reach areas under the sink.
- Screwdrivers: Both flathead and Phillips for disassembling components.
- Cleaning Supplies: Rags, vinegar, and baking soda to clean the area before resealing.
Having the right materials ensures that your resealing job is done correctly and lasts for a long time. Investing in quality tools and components will pay off in the long run, as they reduce the likelihood of future leaks.
What Are the Best Materials for Resealing?
When it comes to resealing a kitchen sink drain, the quality of your materials matters. Opt for durable, long-lasting products that can withstand the demands of daily use. For example, silicone-based plumber’s putty is often preferred for its flexibility and resistance to moisture. Similarly, high-quality gaskets made from durable rubber or neoprene will outperform cheaper alternatives. Always check the manufacturer’s specifications to ensure compatibility with your sink and drain system.
Step-by-Step Guide to Reseal Kitchen Sink Drain
Now that you have all the necessary tools and materials, let’s walk through the process of resealing your kitchen sink drain step by step. Follow these instructions carefully to achieve the best results:
- Turn Off the Water Supply: Before starting any plumbing work, ensure the water supply is turned off to prevent accidental flooding.
- Empty the Sink Cabinet: Clear out any items stored under the sink to create a clean workspace.
- Remove the Drain Assembly: Use your tools to carefully dismantle the drain components, starting with the P-trap and working upward.
- Clean the Area: Wipe down the pipes and fittings with a damp cloth and remove any old putty or debris.
- Apply New Seals: Install fresh gaskets and apply plumber’s putty around the sink flange for a tight seal.
- Reassemble the Drain: Put everything back together in reverse order, ensuring all connections are snug but not overtightened.
- Test for Leaks: Turn the water supply back on and run water through the sink to check for any remaining leaks.
Following these steps will help you complete the resealing process efficiently and effectively. Take your time during each stage to ensure a thorough and professional result.
How Long Does the Resealing Process Take?
The time required to reseal a kitchen sink drain depends on the extent of the damage and your level of experience. For minor repairs, the process might take an hour or two, while more complex jobs could require several hours. Regardless of the time investment, the satisfaction of completing the task yourself is well worth the effort.
How to Prevent Future Leaks?
Preventing future leaks involves a combination of proper maintenance and proactive care. Here are some tips to keep your kitchen sink drain functioning optimally:
- Regularly inspect the plumbing system for signs of wear or corrosion.
- Clean the drain and P-trap periodically to remove buildup and debris.
- Use strainers to prevent food particles and other objects from entering the drain.
- Avoid using harsh chemicals that can damage seals and pipes.
By incorporating these practices into your routine, you can significantly reduce the risk of future leaks and extend the lifespan of your plumbing system.
Can Proper Maintenance Eliminate the Need for Resealing?
While regular maintenance can minimize the frequency of resealing, it’s unlikely to eliminate the need entirely. Over time, even well-maintained systems may require resealing due to natural wear and tear. However, staying on top of maintenance will make the process less frequent and less intensive when it does become necessary.
Common Mistakes to Avoid When Resealing
Even experienced DIYers can fall prey to common mistakes when resealing a kitchen sink drain. Here are a few pitfalls to watch out for:
- Overtightening Connections: Excessive force can damage fittings and create new leaks.
- Using Inferior Materials: Cheap gaskets and seals may not hold up under pressure, leading to premature failure.
- Skipping the Cleaning Step: Failing to remove old putty or debris can compromise the effectiveness of new seals.
Avoiding these mistakes will help ensure a successful resealing job that stands the test of time.
Is It Better to Hire a Plumber?
While resealing a kitchen sink drain is often a manageable DIY project, there are situations where hiring a professional plumber might be the better choice. If the leak is severe, involves multiple components, or requires specialized tools, a plumber’s expertise can save you time and frustration. Additionally, if you’re not comfortable working with plumbing systems or lack the necessary tools, enlisting professional help ensures the job is done correctly.
When Should I Call a Plumber?
If you’ve attempted to reseal your kitchen sink drain and the leak persists, it’s time to call in a professional. Persistent leaks can indicate deeper issues that require advanced diagnostics and repairs. Similarly, if your plumbing system is outdated or in poor condition, a plumber can assess whether replacement parts or a complete overhaul are necessary.
Frequently Asked Questions
How Often Should I Reseal My Kitchen Sink Drain?
On average, you should reseal your kitchen sink drain every 5-7 years, depending on usage and material quality. However, if you notice signs of leakage or wear, it’s best to address the issue promptly.
Can I Use Duct Tape as a Temporary Fix?
While duct tape can provide a temporary seal, it’s not a permanent solution and may fail under pressure. For long-term results, always use proper plumbing materials and techniques.
Are Silicone Sealants Better Than Plumber’s Putty?
Both silicone sealants and plumber’s putty have their advantages, but plumber’s putty is generally preferred for kitchen sink drains due to its flexibility